# Add an Envbuilder template
A Coder administrator adds an Envbuilder-compatible template to Coder. This
allows the template to prompt the developer for their dev container repository's
URL as a [parameter](/beta-docs/admin/templates/extending-templates/parameters/) when they create
their workspace. Envbuilder clones the repo and builds a container from the
`devcontainer.json` specified in the repo.
You can create template files through the Coder dashboard, CLI, or you can
choose a template from the
[Coder registry](https://registry.coder.com/templates):
1. In the Coder dashboard, select **Templates** > **New Template**.
The template builder opens.
2. The template builder does not currently include dev-container-compatible base templates.
Select **Upload an existing template** at the bottom of the page to upload your Terraform files directly.
3. Upload your `.zip` or `.tar.gz` file, enter the details, then select **Create template**.
4. Edit the template files to fit your deployment.
1. Use the `template init` command to initialize your choice of image:
```sh
coder template init --id kubernetes-devcontainer
```
A list of available templates is shown in the
[templates\_init](/beta-docs/reference/cli/templates/) reference.
2. `cd` into the directory and push the template to your Coder deployment:
```sh
cd kubernetes-devcontainer && coder templates push
```
You can also edit the files or make changes to the files before you push them
to Coder.
1. Go to the [Coder registry](https://registry.coder.com/templates) and select a
dev container-compatible template.
2. Copy the files to your local device, then edit them to fit your needs.
3. Upload them to Coder through the CLI or dashboard:
* CLI:
```sh
coder templates push -d
```
* Dashboard:
1. Create a `.zip` of the template files:
* On Mac or Windows, highlight the files and then right click. A
"compress" option is available through the right-click context menu.
* To zip the files through the command line:
```sh
zip templates.zip Dockerfile main.tf
```
2. Select **Templates**.
3. Select **Create Template**, then **Upload template**:

4. Drag the `.zip` file into the **Upload template** section and fill out the
details, then select **Create template**.

To set variables such as the namespace, go to the template in your Coder
dashboard and select **Settings** from the **⋮** (vertical ellipsis) menu:
 ## Envbuilder Terraform provider [#envbuilder-terraform-provider]
When using the
[Envbuilder Terraform provider](https://registry.terraform.io/providers/coder/envbuilder/latest/docs),
a previously built and cached image can be reused directly, allowing dev
containers to start instantaneously.
Developers can edit the `devcontainer.json` in their workspace to customize
their development environments:
```json
# …
{
"features": {
"ghcr.io/devcontainers/features/common-utils:2": {}
}
}
# …
```
## Example templates [#example-templates]
| Template | Description |
| --------------------------------------------------------------------------------------------------------------------------- | ------------------------------------------------------------------------------------------------------------------------------------------------------------------- |
| [Docker dev containers](https://github.com/coder/coder/blob/release/2.37/examples/templates/docker-devcontainer) | Docker provisions a development container. |
| [Kubernetes dev containers](https://github.com/coder/coder/blob/release/2.37/examples/templates/kubernetes-devcontainer) | Provisions a development container on the Kubernetes cluster. |
| [Google Compute Engine dev container](https://github.com/coder/coder/blob/release/2.37/examples/templates/gcp-devcontainer) | Runs a development container inside a single GCP instance. It also mounts the Docker socket from the VM inside the container to enable Docker inside the workspace. |
| [AWS EC2 dev container](https://github.com/coder/coder/blob/release/2.37/examples/templates/aws-devcontainer) | Runs a development container inside a single EC2 instance. It also mounts the Docker socket from the VM inside the container to enable Docker inside the workspace. |
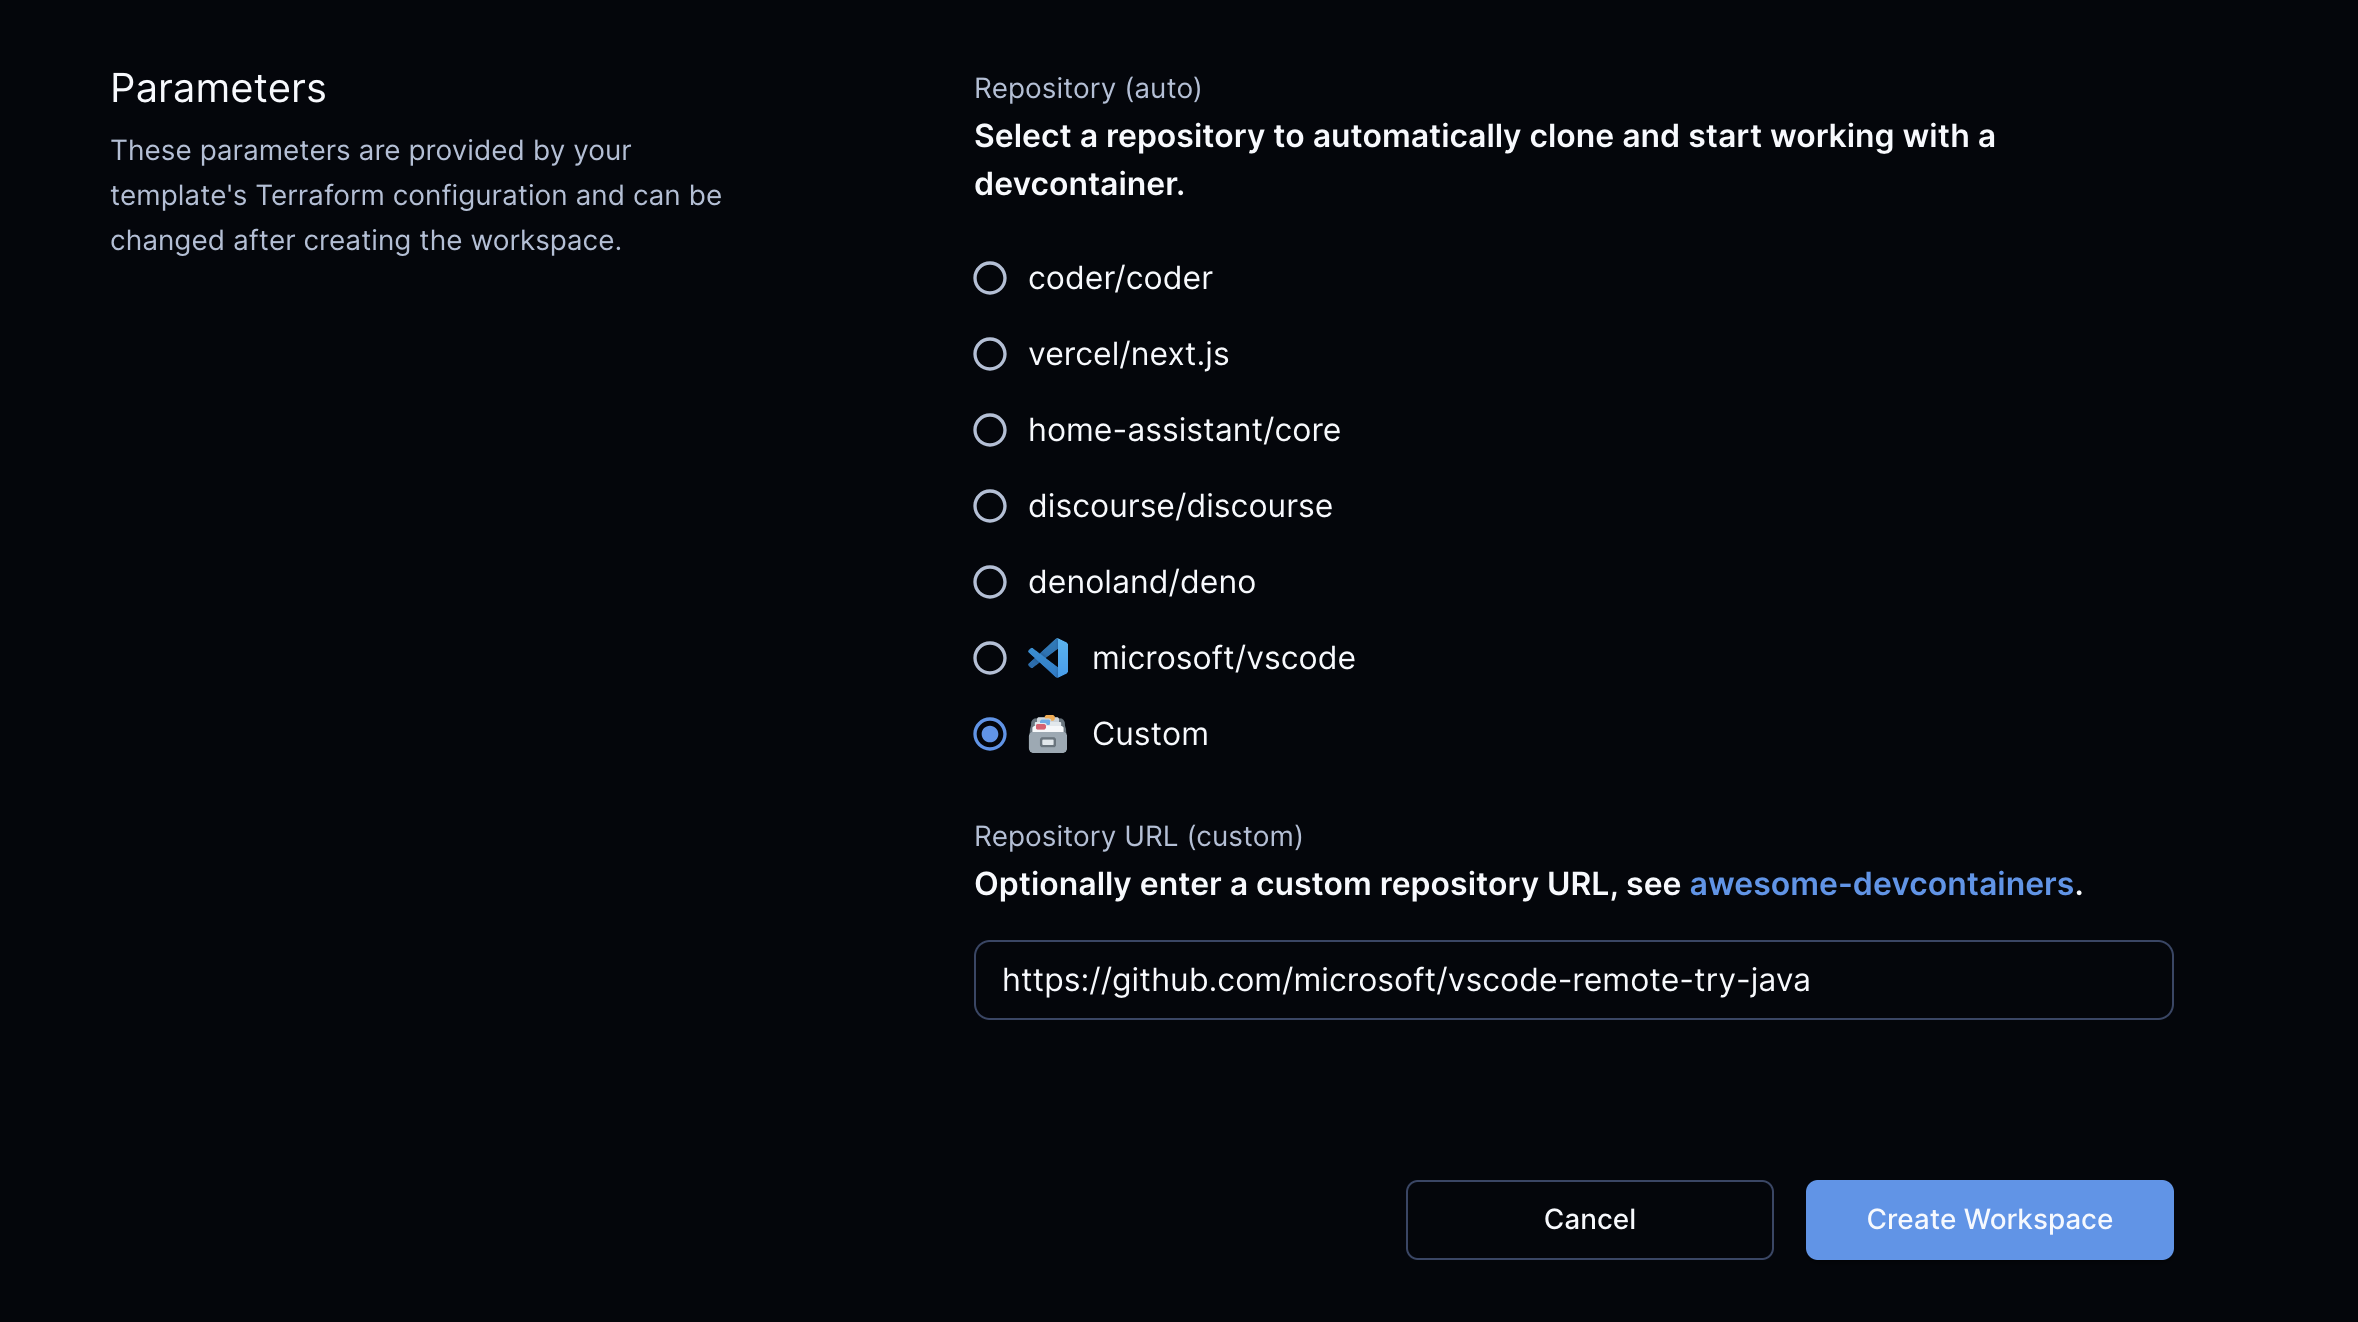
Your template can prompt the user for a repo URL with
[parameters](/beta-docs/admin/templates/extending-templates/parameters/):
## Dev container lifecycle scripts [#dev-container-lifecycle-scripts]
The `onCreateCommand`, `updateContentCommand`, `postCreateCommand`, and
`postStartCommand` lifecycle scripts are run each time the container is started.
This could be used, for example, to fetch or update project dependencies before
a user begins using the workspace.
Lifecycle scripts are managed by project developers.
## Next steps [#next-steps]
* [Envbuilder security and caching](/beta-docs/admin/integrations/devcontainers/envbuilder/envbuilder-security-caching/)
## Envbuilder Terraform provider [#envbuilder-terraform-provider]
When using the
[Envbuilder Terraform provider](https://registry.terraform.io/providers/coder/envbuilder/latest/docs),
a previously built and cached image can be reused directly, allowing dev
containers to start instantaneously.
Developers can edit the `devcontainer.json` in their workspace to customize
their development environments:
```json
# …
{
"features": {
"ghcr.io/devcontainers/features/common-utils:2": {}
}
}
# …
```
## Example templates [#example-templates]
| Template | Description |
| --------------------------------------------------------------------------------------------------------------------------- | ------------------------------------------------------------------------------------------------------------------------------------------------------------------- |
| [Docker dev containers](https://github.com/coder/coder/blob/release/2.37/examples/templates/docker-devcontainer) | Docker provisions a development container. |
| [Kubernetes dev containers](https://github.com/coder/coder/blob/release/2.37/examples/templates/kubernetes-devcontainer) | Provisions a development container on the Kubernetes cluster. |
| [Google Compute Engine dev container](https://github.com/coder/coder/blob/release/2.37/examples/templates/gcp-devcontainer) | Runs a development container inside a single GCP instance. It also mounts the Docker socket from the VM inside the container to enable Docker inside the workspace. |
| [AWS EC2 dev container](https://github.com/coder/coder/blob/release/2.37/examples/templates/aws-devcontainer) | Runs a development container inside a single EC2 instance. It also mounts the Docker socket from the VM inside the container to enable Docker inside the workspace. |
Your template can prompt the user for a repo URL with
[parameters](/beta-docs/admin/templates/extending-templates/parameters/):

## Dev container lifecycle scripts [#dev-container-lifecycle-scripts]
The `onCreateCommand`, `updateContentCommand`, `postCreateCommand`, and
`postStartCommand` lifecycle scripts are run each time the container is started.
This could be used, for example, to fetch or update project dependencies before
a user begins using the workspace.
Lifecycle scripts are managed by project developers.
## Next steps [#next-steps]
* [Envbuilder security and caching](/beta-docs/admin/integrations/devcontainers/envbuilder/envbuilder-security-caching/)