# Get started with Coder
October 23, 2024
***
Follow the steps in this guide to install Coder locally or on a cloud-hosting
provider, set up a workspace, and connect to it from VS Code.
By the end of this guide, you'll have a remote development environment that you
can connect to from any device anywhere, so you can work on the same files in a
persistent environment from your main device, a tablet, or your phone.
## Install and start Coder
1. Install Docker:
```bash
curl -sSL https://get.docker.com | sh
```
For more details, visit:
* [Linux instructions](https://docs.docker.com/desktop/install/linux-install/)
* [Mac instructions](https://docs.docker.com/desktop/install/mac-install/)
2. Assign your user to the Docker group:
```shell
sudo usermod -aG docker $USER
```
3. Run `newgrp` to activate the groups changes:
```shell
newgrp docker
```
You might need to log out and back in or restart the machine for changes to
take effect.
4. Install Coder:
```shell
curl -L https://coder.com/install.sh | sh
```
* For standalone binaries, system packages, or other alternate installation
methods, refer to the
[latest release on GitHub](https://github.com/coder/coder/releases/latest).
5. Start Coder:
```shell
coder server
```
1. Install Docker:
```bash
curl -sSL https://get.docker.com | sh
```
For more details, visit:
* [Linux instructions](https://docs.docker.com/desktop/install/linux-install/)
* [Mac instructions](https://docs.docker.com/desktop/install/mac-install/)
2. Assign your user to the Docker group:
```shell
sudo usermod -aG docker $USER
```
3. Run `newgrp` to activate the groups changes:
```shell
newgrp docker
```
You might need to log out and back in or restart the machine for changes to
take effect.
4. Install Coder:
```shell
curl -L https://coder.com/install.sh | sh
```
* For standalone binaries, system packages, or other alternate installation
methods, refer to the
[latest release on GitHub](https://github.com/coder/coder/releases/latest).
5. Start Coder:
```shell
coder server
```
> **Important:** If you plan to use the built-in PostgreSQL database, ensure
> that the
> [Visual C++ Runtime](https://learn.microsoft.com/en-US/cpp/windows/latest-supported-vc-redist#latest-microsoft-visual-c-redistributable-version)
> is installed.
1. [Install Docker](https://docs.docker.com/desktop/install/windows-install/).
2. Use the
[`winget`](https://learn.microsoft.com/en-us/windows/package-manager/winget/#use-winget)
package manager to install Coder:
```powershell
winget install Coder.Coder
```
3. Start Coder:
```shell
coder server
```
## Configure Coder with a new Workspace
1. If you're running Coder locally, go to [http://0.0.0.0:3001/setup](http://0.0.0.0:3001/setup).
* If you get a browser warning similar to `Secure Site Not Available`, you
can ignore the warning and continue to the setup page.
If your Coder server is on a network or cloud device, locate the message in
your terminal that reads,
`View the Web UI: https://..try.coder.app`. The server
begins to stream logs immediately and you might have to scroll up to find it.
2. On the **Welcome to Coder** page, enter the information to create an admin
user, then select **Create account**.
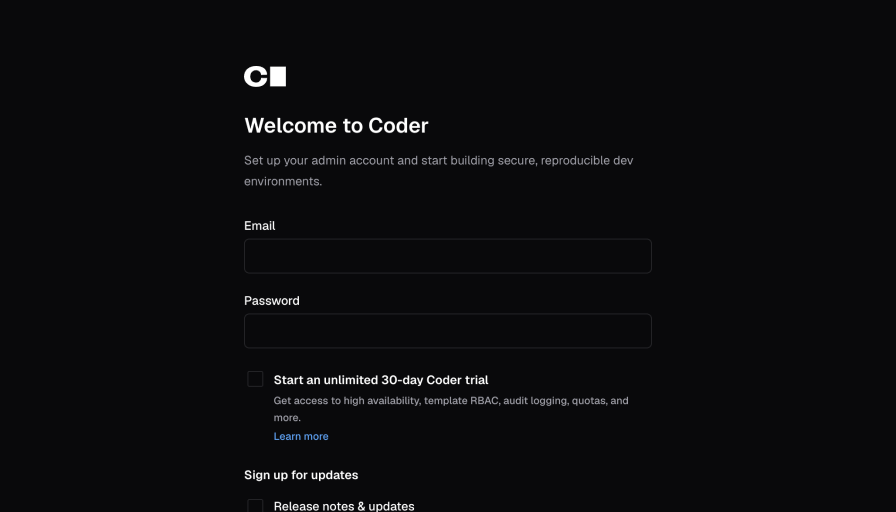*Welcome
to Coder - Create admin user*
3. On the **Workspaces** page, select **Go to templates** to create a new
template.
4. For this guide, use a Docker container. Locate **Docker Containers** and
select **Use template**.
5. Give the template a **Name** that you'll recognize both in the Coder UI and
in command-line calls.
The rest of the template details are optional, but will be helpful when you
have more templates.
*Create
template*
6. Select **Create template**.
7. After the template is ready, select **Create Workspace**.
8. Give the workspace a name and select **Create Workspace**.
9. Coder starts your new workspace:
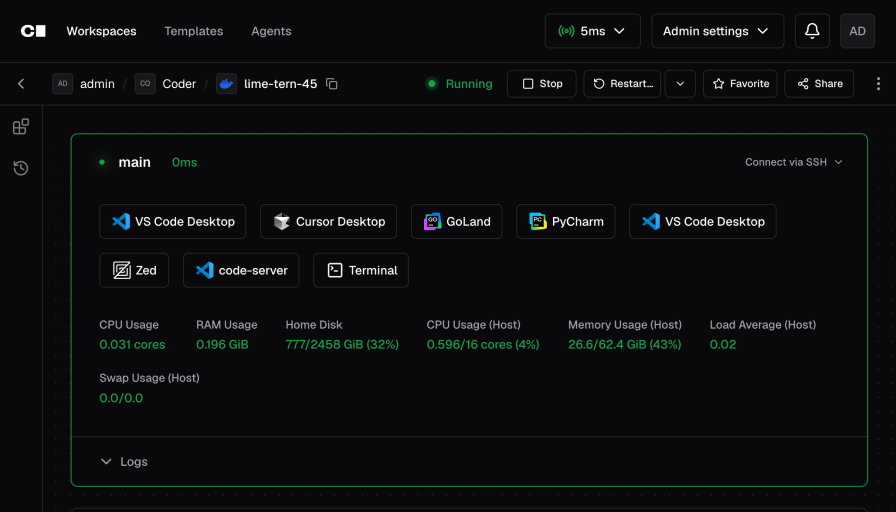*Workspace
is running*
10. Select **VS Code Desktop** to install the Coder extension and connect to your
Coder workspace.
## Work on some code
After VS Code loads the remote environment, you can select **Open Folder** to
explore directories in the Docker container or work on something new.
To clone an existing repository:
1. Select **Clone Repository** and enter the repository URL.
For example, to clone the Coder repo, enter
`https://github.com/coder/coder.git`.
Learn more about how to find the repository URL in the
[GitHub documentation](https://docs.github.com/en/repositories/creating-and-managing-repositories/cloning-a-repository).
2. Choose the folder to which VS Code should clone the repo. It will be in its
own directory within this folder.
Note that you cannot create a new parent directory in this step.
3. After VS Code completes the clone, select **Open** to open the directory.
4. You are now using VS Code in your Coder environment!
## What's next?
Now that you have your own workspace, use the same template to set one up for a
teammate.
Go to **Templates** and select **Create Workspace** and continue from Step 7 in
[Configure Coder with a new workspace](#configure-coder-with-a-new-workspace).
After that, you can try to:
* [Customize templates](/docs/@v2.17.3/admin/templates/extending-templates/)
* [Enable Prometheus metrics](/docs/@v2.17.3/admin/integrations/prometheus/)
* [Deploy to Google Cloud Platform (GCP)](/docs/@v2.17.3/install/cloud/compute-engine/)
## Troubleshooting
### Cannot connect to the Docker daemon
> Error: Error pinging Docker server: Cannot connect to the Docker daemon at
> unix:///var/run/docker.sock. Is the docker daemon running?
1. Install Docker for your system:
```shell
curl -sSL https://get.docker.com | sh
```
2. Set up the Docker daemon in rootless mode for your user to run Docker as a
non-privileged user:
```shell
dockerd-rootless-setuptool.sh install
```
Depending on your system's dependencies, you might need to run other commands
before you retry this step. Read the output of this command for further
instructions.
3. Assign your user to the Docker group:
```shell
sudo usermod -aG docker $USER
```
4. Confirm that the user has been added:
```console
$ groups
docker sudo users
```
* Ubuntu users might not see the group membership update. In that case, run
the following command or reboot the machine:
```shell
newgrp docker
```
### Can't start Coder server: Address already in use
```shell
Encountered an error running "coder server", see "coder server --help" for more information
error: configure http(s): listen tcp 127.0.0.1:3000: bind: address already in use
```
1. Stop the process:
```shell
sudo systemctl stop coder
```
2. Start Coder:
```shell
coder server
```
