This article walks you through setting up single sign-on to Coder using Azure's Active directory.
Configuring Coder's OpenID Connect feature requires you to provide three pieces of information from Azure:
- Client ID
- Client Secret
- Issuer
This guide will show you how to set up Azure's Active Directory and obtain the information you need to provide to Coder.
Step 1: Register your app with Azure
-
Log in to Azure.
-
Using the search bar at the top, enter App registrations and click the matching search result.

-
Click New registration.
-
Provide a Name for your application.
-
Select the access option that best fits your needs; use Default Directory only - Single tenant unless your AD requires multi-tenancy.

-
Provide your Redirect URL (it will be formatted similar to
https://coder.exampleCo.com/oidc/callback). -
Click Register to proceed.
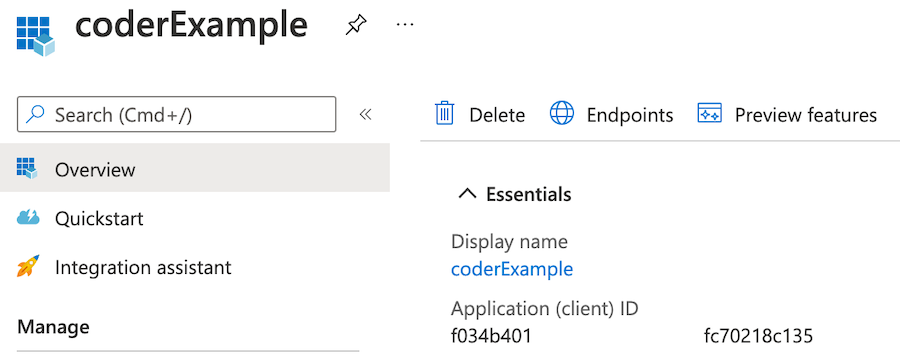
When Azure has created your app, you'll be redirected to Overview, which displays the app information.
Step 2: Gather your Azure app information
Once you've registered your app, you can obtain your:
- Client ID
- Client Secret
- Issuer
Client ID
On your application's Overview, look for the Application (client) ID under the Essentials section. This is the value Coder expects as the Client ID.
Client secret
You'll need to create the client secret. To do so:
- Go to Certificates & secrets.
- Click New client secret.
- Provide a description for your secret and set an expiration date, and click Add. (We recommend creating a calendar notification to alert you shortly before your secret is set to expire.)
- You'll be redirected back to the Certificates & secrets page; save the Value field string for use as your client secret.

Issuer
On your app's Overview page, click Endpoints. Find OpenID Connect metadata document, and copy the first 2/3s of this value.

For example, if the full value is:
https://login.microsoftonline.com/6a8e8517-e411-4f53-a4b9-aba6f1646271/v2.0/.well-known/openid-configuration
Then remove /.well-known/openid-configuration, leaving the following as your
issuer:
https://login.microsoftonline.com/6a8e8...6271/v2.0
Be sure to keep v2.0, though you must omit the / from the end.
If there's an issue during the configuration process, the error message will tell you the value you provided and the value it expected; you can use this information to correct your configuration.
Step 3: Configure Coder authentication
Once you've saved your Azure values, you can complete the remaining steps using the Coder UI.
- Log in to Coder, and go to Manage > Admin > Authentication.
- In the top-most drop-down box, select OpenID Connect.
- Provide the requested values for Client ID, Client Secret, and Issuer. Optionally, you can specify Additional Scopes.
When done, click Save Preferences.
At this point, Coder validates your configuration before proceeding. If successful, you can expect Coder to send OIDC login attempts to Azure.