Connect to a Remote Server with VS Code


The original article was written by Ben Potter. We’ve updated it to cover the latest improvements to these methods for connecting to remote development servers.
Historically, using a development environment across multiple devices would mean compromises on speed, access, or device options. With VS Code however, developing from any device is much more approachable.
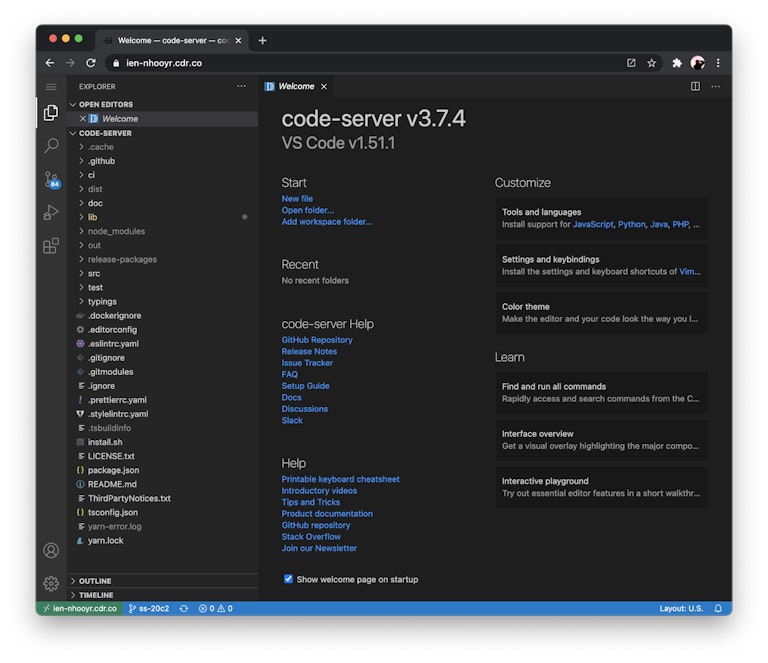
VS Code (Remote SSH): Use VS Code on the desktop to connect and develop on a remote machine - code-server: UseAccess VS Code onfrom athe web browser, runs on a remote machine or run a local machine that you access remotely
Both of these tools have their advantages and disadvantages. For most of my projects, I develop remotely on cloud servers. With other projects, like (iOS development), I use my local machine but use tunnels to connect to it from any device.
Here's my workflow:
- I use VS Code (Remote SSH) for near-local experience
- I use code-server to connect from unfamiliar devices (e.g Grandma’s computer) or “light” devices such as an iPad or Chromebook
- I also use VS Code on my MacBook and open it up with
code-server --link
Installing code-server
code-server is an open source project that hosts VS Code in the web browser. It can be installed on a remote server or locally (to make your local environment remote).
Use code-server’s install script:
Run as a Docker container:
Other options are in our docs: Installing code-server
Syncing code-server and VS Code settings (optional)
You can also configure code-server to use the same settings and extensions as VS Code.
Add the VS Code directories. On macOS, they are:
Connect to a remote server
Once you have code-server and/or VS Code Remote installed, it’s time to make them accessible remotely. Normally, this would require either port forwarding, configuring firewalls, or a VPN,
Option 1: code-server —link
If you’ll only be connecting remotely from the web browser, you can use the code-server --link flag to get a public tunneled URL. Instead of authenticating with a password, you’ll be prompted to log in with GitHub. Future logins with the tunneled URL will verify your GitHub account.
You can also add link: true to code-server’s config.yaml to launch with —link by default.
Note: 'code-server' —link will not proxy your SSH server. The next option can do this for you.
Option 2: Self-host a tunnel
A self-hosted tunnel exposes local services to the internet. I’ve chosen Inlets Pro, which is a self-hosted tunneling software with abstractions that makes it simple to get to my instance of code-server. Inlets is not free, so you’ll need a license for inlets Pro. Their personal plan is $25.00/month.
Since this is also a self-hosted solution, you’ll need a remote server and a domain name. I use DigitalOcean for this, which costs me roughly $5/month.
Alex Ellis, the founder of Inlets (and OpenFaaS), and I connected and he provided some excellent support when preparing this guide. Inlets offers a lot of flexibility when it comes to self-hosting tunnels, but also has the inletsctl tool to get up and running quickly!
Installing inlets-pro
If you already have a server, you can use the inlets documentation to install & configure inlets-pro.
In this example, I use inletsctl to deploy an “exit” server. The inlets doc has examples for different providers that work great, just be sure to include the Let’s Encrypt flags.
Be sure to replace the domain, email, and optionally the region. Also include a DigitalOcean access token from your account.
After the server is created, inletsctl will return the server’s IP address. Add a DNS A record for your custom domain to the IP. Inlets will also give an example command on how to start a tunnel. Change the —upstream flag to the where code-server is hosted (usually 127.0.0.1:8080). Also, this is where you add your inlets license.
After that, you’ll be able to access your secure tunnel via your domain.
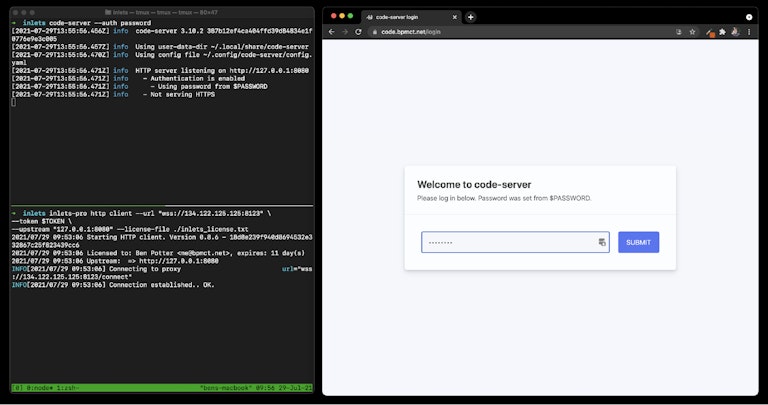
Tunneling a SSH server with inlets is also possible. To do this, we’ll need to log in to the exit server (the one we created with inletsctl) and run a second instance of inlets in TCP mode. We’ll also need to edit our local machine’s SSH settings so that it can listen on another port (since the exit server already uses port 22).
Installing/enabling a SSH server
If you want to access your dev environment over VS Code Remote SSH, you’ll need an SSH server running on your machine. Most operating systems have a built-in -SSH server that just has to be enabled.
- MacOS
- Windows 11 and Windows Server 2022
- Linux: You probably know what you’re doing for SSH :)
Looking forward
It’s clear there are a lot of options when it comes to developing in the cloud. Wherever you are developing (local machine, managed service, or private datacenter), developers can have smooth workflows without compromises.
I’m particularly interested in how we can enable these workflows while also reducing the setup/friction associated with developing on remote servers such as provisioning, managing access keys, or setting up tunnels. Here are a few things we’re still exploring and improving at Coder:
- a single tunnel to a server for SSH and multiple IDEs
- extension for tunneling ports inside code-server
- 1-click provisioning and access for dev servers
- dev teams using containers for their dev environments (local, remote, or hybrid)
Thoughts? We’d love to hear from you. Drop us a note or reach us on Slack.
Subscribe to our newsletter
Want to stay up to date on all things Coder? Subscribe to our monthly newsletter and be the first to know when we release new things!
