Remote developer environments on Fly.io

Fly.io is a platform for deploying applications to the edge. It's a great fit for Coder because it's easy to deploy, scale, and manage. In this guide, we'll walk through deploying Coder on Fly.io and creating remote workspaces as Fly.io (firecracker) machines.
Prerequisites
Deploy Coder
Log in to Fly.io with the CLI:
flyctl auth loginCreate a new fly postgres database:
flyctl postgres create --name <postgres-app-name>Create a new fly app:
flyctl apps create --name <coder-app-name>Connect to the database with the coder fly app:
flyctl postgres attach --app <coder-app-name> <postgres-app-name>Important Copy the connection string that is displayed in the terminal. You'll need it in the next step.
Create a new secret with the name
CODER_PG_CONNECTION_URLand the value as the connection string you copied in the previous step.flyctl secrets set CODER_PG_CONNECTION_URL=<connection-string> --app <coder-app-name>Edit the
fly.tomlfile and update as per the example below:app = "<coder-app-name>" # Replace <coder-app-name> with the name of your app kill_signal = "SIGINT" kill_timeout = 5 primary_region = "ams" # See a list of regions here: https://fly.io/docs/reference/regions/ [experimental] auto_rollback = true private_network = true # Allows Coder to connect to the database [build] image = "ghcr.io/coder/coder:latest" [env] CODER_ACCESS_URL = "https://<coder-app-name>.fly.dev" # Replace <app-name> with the name of your app CODER_HTTP_ADDRESS = "0.0.0.0:3000" #CODER_VERBOSE = "true" # Uncomment this if you want to see more logs CODER_TELEMETRY_INSTALL_SOURCE = "fly.io" [[services]] protocol = "tcp" internal_port = 3000 processes = ["app"] [[services.ports]] port = 80 handlers = ["http"] force_https = true [[services.ports]] port = 443 handlers = ["tls", "http"] [services.concurrency] type = "connections" hard_limit = 25Deploy the app:
Run the following command to deploy the app from the directory where the
fly.tomlfile is located:flyctl deploy --app <coder-app-name>Scale the Coder app to 1GB of memory:
flyctl scale memory 1024 --app <coder-app-name>Congratulations! You've deployed Coder on Fly.io!. Go to the URL of your app and create your first user!
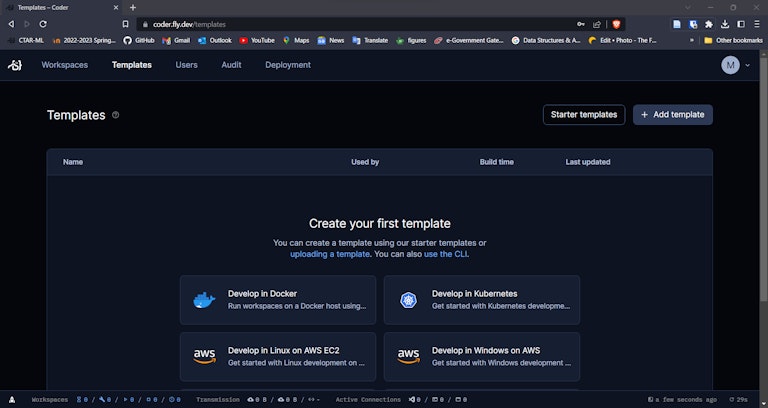
If you want to use a custom domain, you can do so by following the instructions here.
Create your first template
Warning: The following steps may not work as expected becasue Fly.io has deprecated and ended support of their terraform provider. See https://github.com/fly-apps/terraform-provider-fly for more details.
A template is a set of instructions that Coder uses to create a workspace. In this section, we'll create a template that uses a Fly.io machine as the workspace.
Install Coder locally by following the instructions here or if you are on linux/macOS, you can run the following command:
curl -fsSL https://coder.com/install.sh | bashLogin to Coder:
coder login <coder-url>Create a new template by running the following command and following the prompts:
coder templates initChoose the
fly-docker-imagetemplate and cd into thefly-docker-imagedirectory.bash cd fly-docker-image && coder templates createCreate the new template by running the following command from the
fly-docker-imagedirectory:coder templates push fly-docker-image --variable fly_api_token=$(flyctl auth token)

If Coder is deployed as a fly.io app, instead of setting variable fly_api_token you can also set a fly.io secret with the name FLY_API_TOKEN
Go to the Coder UI and create a new workspace using the fly-docker-image template.
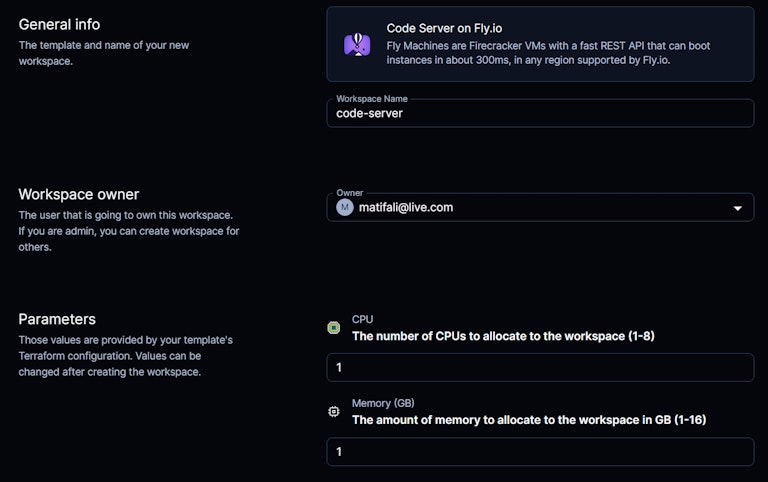
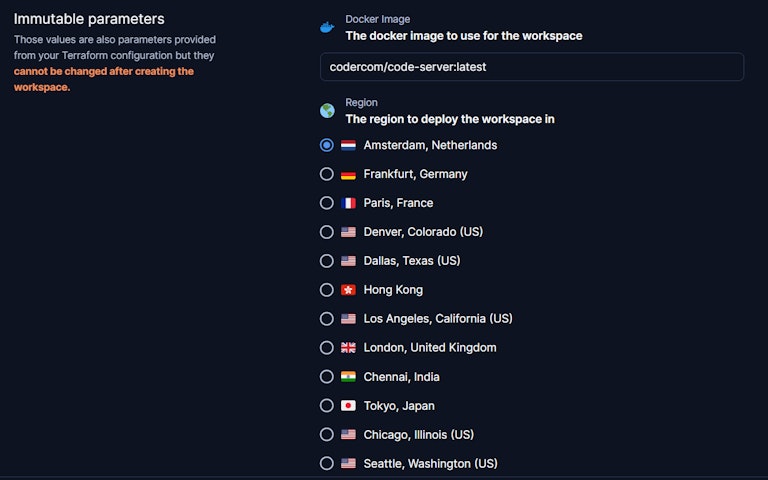
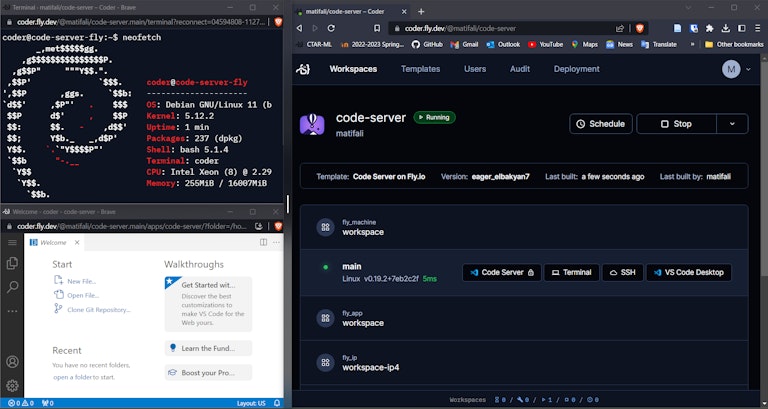
This will deploy code-server on a Fly.io machine using the docker image. You can access the code-server instance by clicking on the Code Server button.
Update Coder
To update the Coder version, run flyctl deploy --aap <coder-app-name> again and it will pull the latest version of Coder.
Next Steps
To modify or write your first coder template, check out the template docs.
Have questions? Contact us or join us on Discord
Subscribe to our newsletter
Want to stay up to date on all things Coder? Subscribe to our monthly newsletter and be the first to know when we release new things!
