Remote development tools for JetBrains IDEs

JetBrains has released some tools that make it possible to develop remotely with their suite of IDEs 🎉
- JetBrains Gateway makes it possible to develop on any server over SSH
- JetBrains Projector makes remote development a possibility for JetBrains IDEs like IntelliJ, PyCharm, GoLand, WebStorm, and more.
The benefits of remote development
Developing on a remote server has a lot of great benefits, including improved speed, security, and consistency. You can also connect to your workspace from any device! In this post, we’ll compare the tools and walk you through how to get started developing on a remote server (or in Coder) with JetBrains.
Remote development with your local IDE (JetBrains Gateway) 🖥️
While it's still in active development, JetBrains Gateway makes it possible to connect to and develop on a remote server with local JetBrains IDEs.
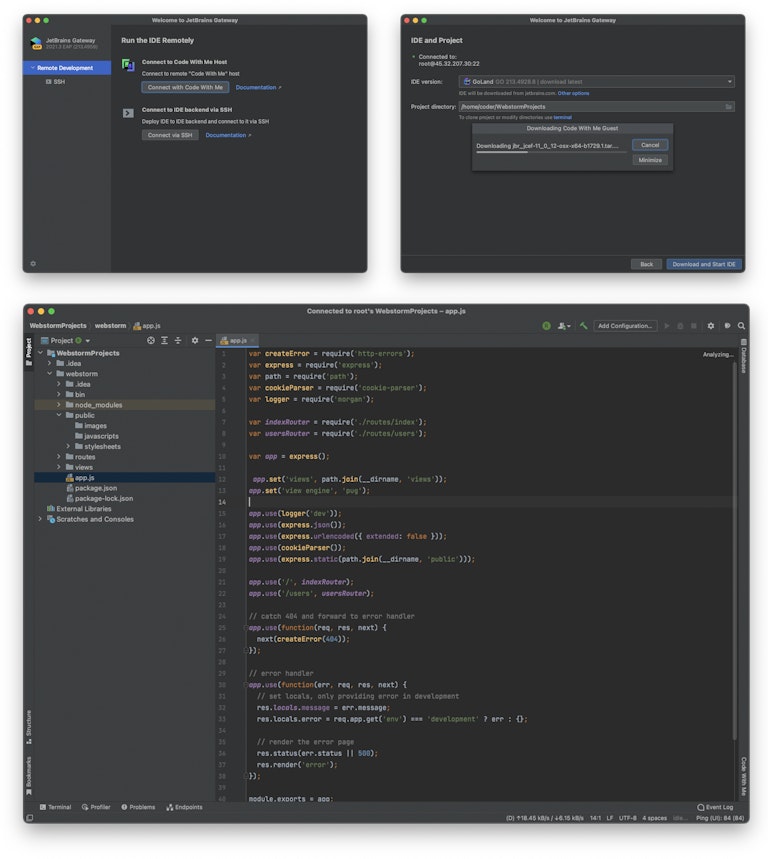
To get started with JetBrains Gateway:
1) Download the JetBrains Gateway via JetBrains Toolbox for the latest version
2) Connect to a remote server (or Coder workspace) over SSH
JetBrains has also added support in their latest IDEs (2021.3 and above) for remote development without the Gateway application.
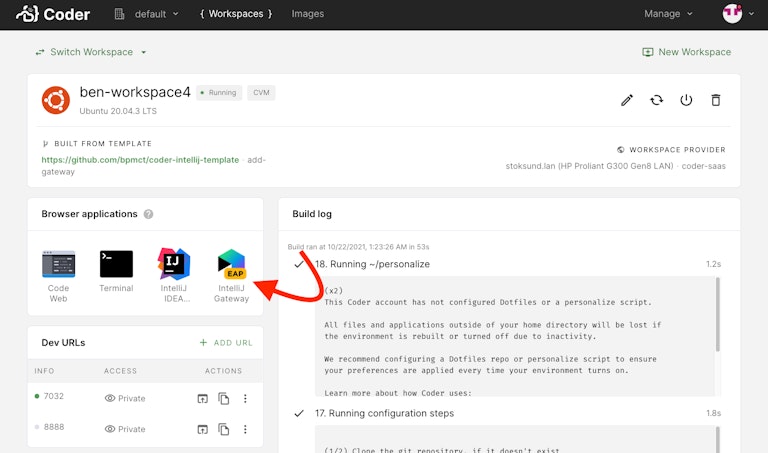
Remote development with your web browser (JetBrains Projector)
Another option would be to use JetBrains Projector. You can install JetBrains IDEs on a remote server and access them via the web browser. As mentioned in their launch post, JetBrains Projector can be particularly useful if you would like to develop securely from a thin client (web browser).
At the time of writing, the following IDEs are supported: IntelliJ IDEA Ultimate, IntelliJ IDEA Community, IntelliJ IDEA Educational, PhpStorm, WebStorm, PyCharm Professional, PyCharm Community, PyCharm Educational, RubyMine, CLion, GoLand, DataGrip, DataSpell, Rider, Android Studio.
To get started with JetBrains Projector
There are a few ways to install JetBrains Projector including container images, install scripts, or even an IDE plugin. If you have many opinions on how to install apps on remote servers, visit the Projector docs for more information. In this guide, we’ll install Projector with pip.
1) If you don’t have a remote server, you’ll need to create one. An Ubuntu virtual machine from Vultr with 4 CPU cores and 8 GB of memory will work great.
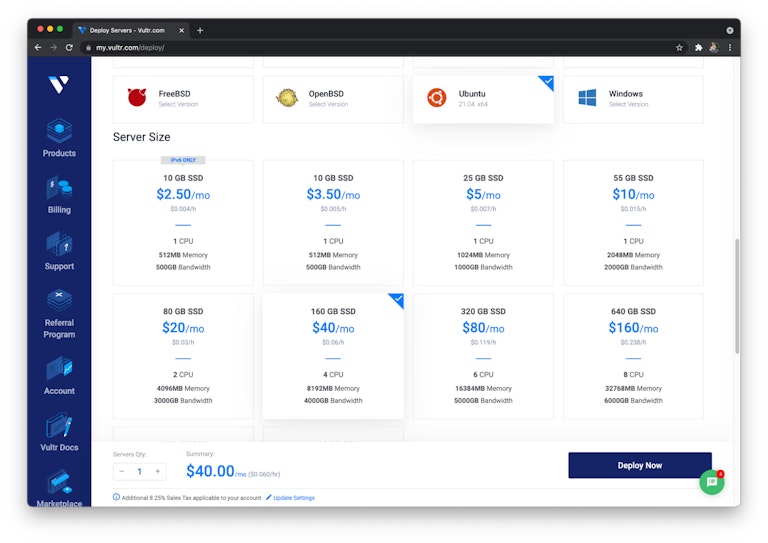
2) Connect to your virtual machine using SSH or the built-in console
3) Install dependencies
4) Create a user to run Projector
5) Install pip and the projector-installer
6) Run projector install to install your first IDE on the remote server
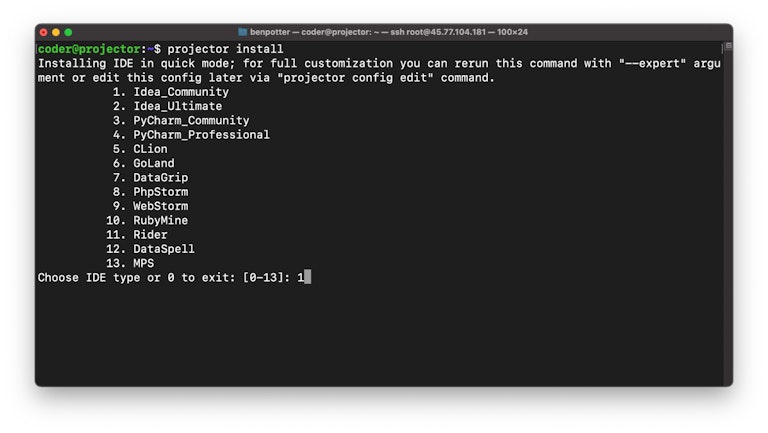
7) Install your IDE of choice
8) You can now connect via the web browser!
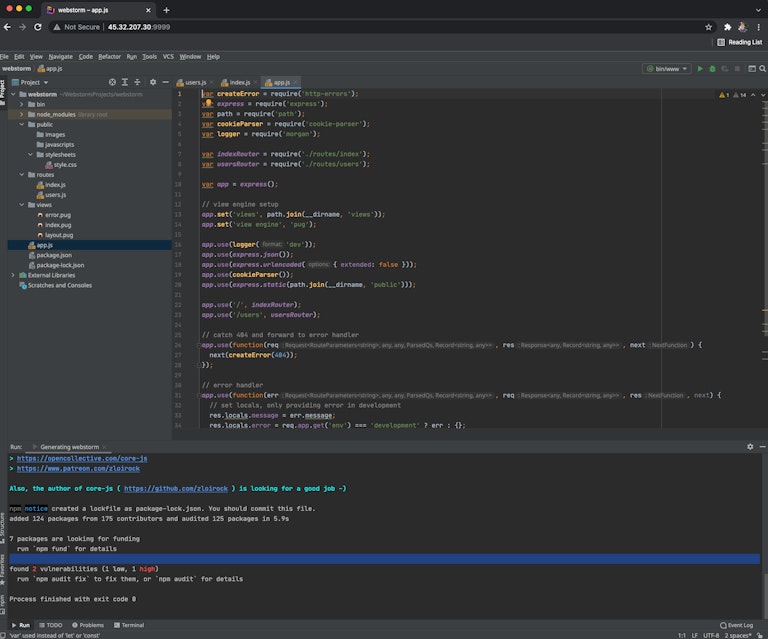
9) If you haven’t already, you’ll probably want to secure your server. You can edit your config with projector config edit. A few options are
- Set a password (handshake token) for Projector
- Only listen on 127.0.0.1, and use a VPN such as Tailscale
- Only listen on 127.0.0.1, and secure with something like CloudFlare Argo, Pomerium, or ngrok with password protection
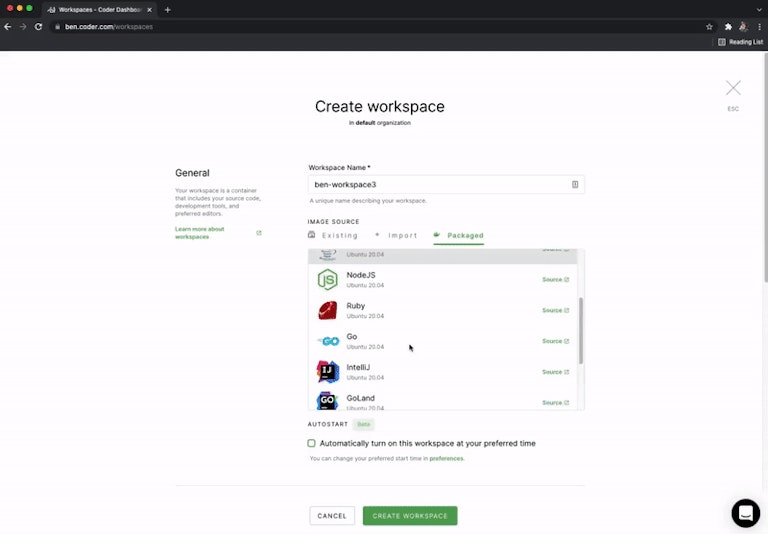
Coder workspaces support JetBrains Projector out of the box. You can use one of Coder’s packaged JetBrains images, or build a custom image including a JetBrains IDE.
Next steps
We'd like to invite you to try Coder, a remote developer workspace platform. Manage multiple workspaces, templates, users, and even develop with multiple IDEs including VS Code, JupyterLab, and JetBrains of course.
To get started, you can self-host Coder or try our hosted beta.
Subscribe to our newsletter
Want to stay up to date on all things Coder? Subscribe to our monthly newsletter and be the first to know when we release new things!
