New
Discover how Dropbox streamlined dev environments & cut costs by switching 1000 developers to Coder

Read the success story

Kubernetes namespaces as dev environments

author avatar
Ben Potter
 on March 6th, 2023

Setting up developer environments for Kubernetes projects can be complex. With Coder, developers can auto-provision a namespace on your development cluster, no need to configure tools or spin up infrastructure locally.

How it works

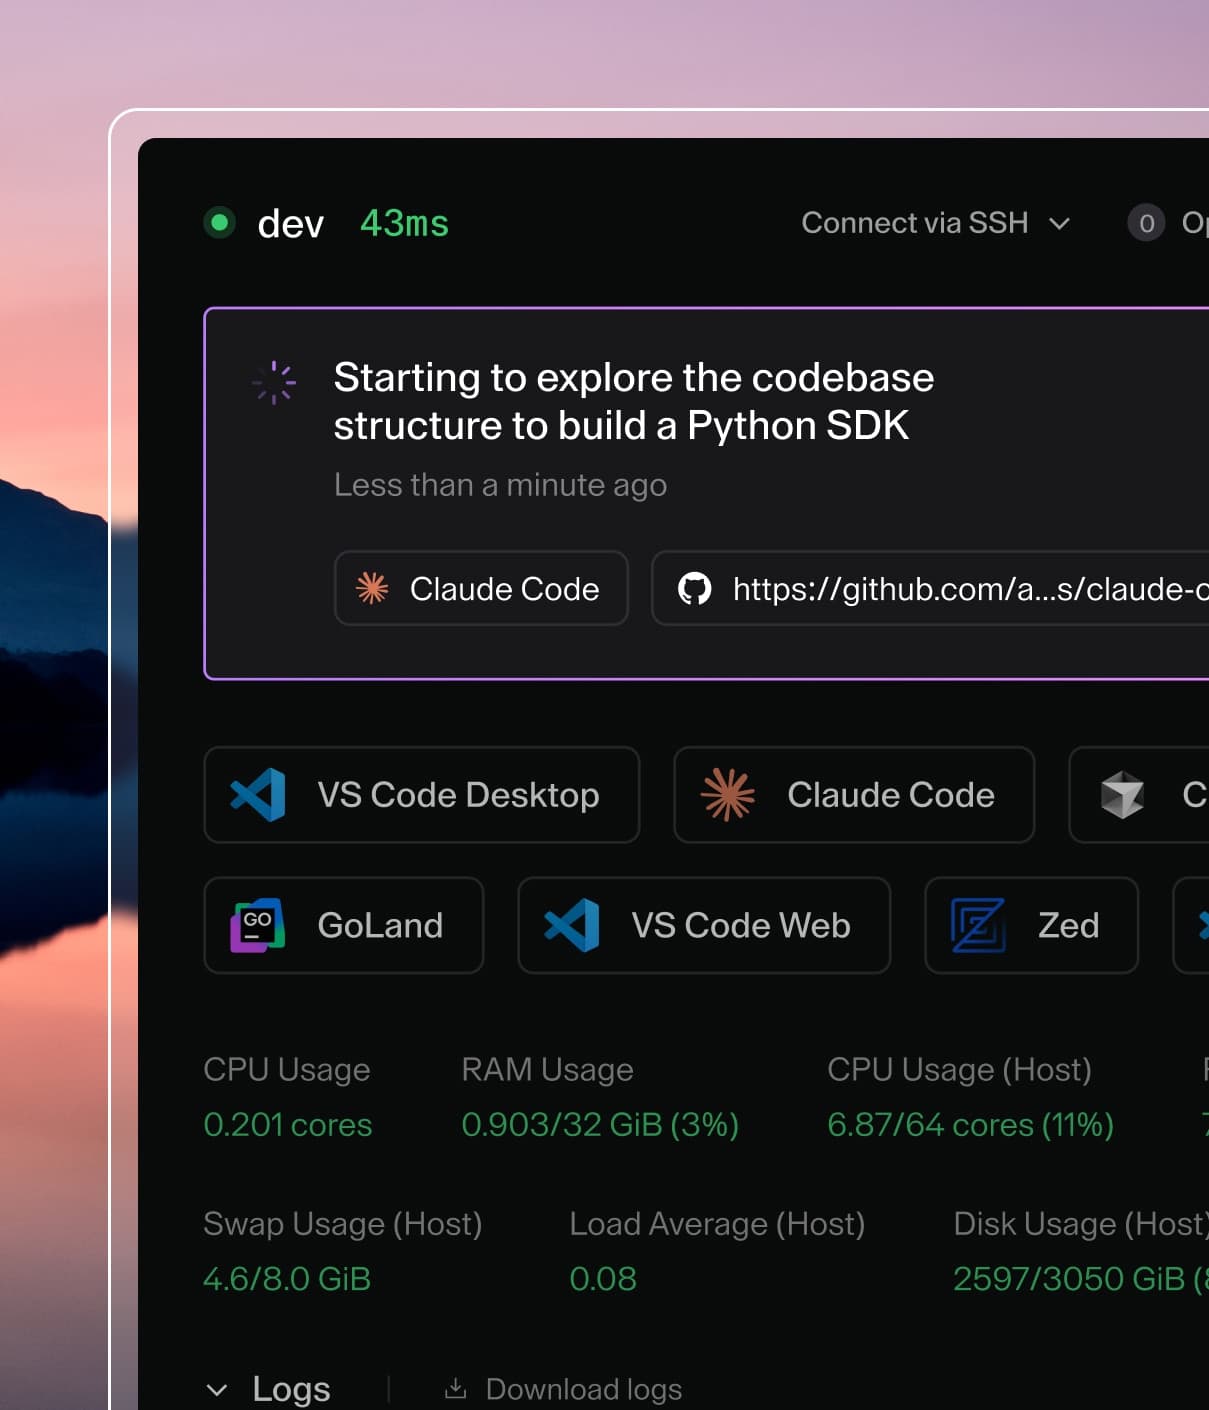
Coder is a self-serve portal for remote developer environments. With a few clicks, an developer can log in with SSO, provision a workspace, and connect via VS Code Remote or a web IDE.

In this tutorial, you'll learn how to create a Coder template that will provision the following resources on behalf of each developer:

  • a Kubernetes namespace
  • a pod with kubectl, helm, tilt, and other DevOps tools
  • a persistent /home/coder volume to store projects and git repositories
  • a ServiceAccount + RoleBinding which allows the user to deploy additional resources within the namespace

Developer tools such as Tilt, Skaffold, Garden, and Okteto can be used inside Coder workspaces for a quicker development loop. Coder makes it easier to provision Kubernetes infrastructure and give developers IDE access.

Prerequisites

This tutorial assumes you already have the following set up:

  • Coder deployment: Coder is open-source and the dashboard can be installed on Kubernetes, VM, or even a local machine. Install Coder
  • "Development" Kubernetes cluster: You'll need a cluster intended for development workloads, and not production.
  • Coder CLI: You'll need the CLI on your local machine to upload templates. The server and client share the same CLI. Install Coder

Create a new Coder template

Coder templates are written in Terraform, meaning any resource from the Terraform registry can be provisoned as part of a template.

Create a new folder for your project on your local machine and create a main.tf file:

# main.tf

terraform {
  required_providers {
    coder = {
      source  = "coder/coder"
      version = "~> 0.6.14"
    }
    kubernetes = {
      source  = "hashicorp/kubernetes"
      version = "~> 2.18.1"
    }
  }
}

provider "kubernetes" {
  config_path = "~/.kube/config"
}

Keep in mind that workspace builds will run Terraform on the Coder server, not your local machine. In this example, there must be a ~/.kube/config file on the Coder server.

Refer to the Kubernetes provider documentation to see different authentication methods. This is necessary if you installed Coder via Helm, since the default ServiceAccount does not have permissions to create namespaces.

Next, add a resource block for the namespace. It uses the workspace name, so each new workspace created with this template will also create a unique workspace name.

# main.tf (continued)

# Info about the current workspace
data "coder_workspace" "me" {}

# Used for all resources created by this template
locals {
  name = "coder-ws-${lower(data.coder_workspace.me.owner)}-${lower(data.coder_workspace.me.name)}"
  labels = {
    "app.kubernetes.io/managed-by" = "coder"
  }
}

resource "kubernetes_namespace" "workspace" {
  metadata {
    name   = local.name
    labels = local.labels
  }
}

Now, import your template into Coder.

coder templates create kubernetes-namespace-example

In the Coder dashboard, you should see your new template.

You can edit the template settings and add a friendly name, description, and icon. I used the official Kubernetes namespace icon, but you could also name the template after the project(s) it is intended for.

From the dashboard, you can also create your first workspace using the template. On the workspace page, Coder will show a list of resources your workspace includes.

You can optionally use resource metadata to customize the listing and expose info about the namespace:

# main.tf (continued)

resource "coder_metadata" "namespace-info" {
  resource_id = kubernetes_namespace.workspace.id
  icon        = "https://svgur.com/i/qsx.svg"
  item {
    key   = "name in cluster"
    value = local.namespace
  }
}

Push your change to Coder, which will create a new template version:

coder templates push kubernetes-namespace-example

After updating your workspace, the resource will have a custom icon and new metadata:

Add a Kubernetes pod to the template

Developers will need a way to connect to their namespaces. Let's add a Kubernetes pod + a ServiceAccount with permissions to provision resources in the pod.

You can find a full version of this template on my GitHub

# main.tf (continued)

# ServiceAccount for the workspace
resource "kubernetes_service_account" "workspace_service_account" {
  metadata {
    name      = local.name
    namespace = kubernetes_namespace.workspace.metadata[0].name
    labels    = local.labels
  }
}

# Gives the ServiceAccount admin access to the
# namespace created for this workspace
resource "kubernetes_role_binding" "set_workspace_permissions" {
  metadata {
    name      = local.name
    namespace = kubernetes_namespace.workspace.metadata[0].name
    labels    = local.labels
  }
  role_ref {
    api_group = "rbac.authorization.k8s.io"
    kind      = "ClusterRole"
    name      = "admin"
  }
  subject {
    kind      = "ServiceAccount"
    name      = kubernetes_service_account.workspace_service_account.metadata[0].name
    namespace = kubernetes_namespace.workspace.metadata[0].name
  }
}

# The Coder agent allows the workspace owner
# to connect to the pod from a web or local IDE
resource "coder_agent" "primary" {
  os   = "linux"
  arch = "amd64"

  login_before_ready     = false
  startup_script_timeout = 180
  startup_script         = <<-EOT
    set -e

    # install and start code-server
    curl -fsSL https://code-server.dev/install.sh | sh -s -- --method=standalone --prefix=/tmp/code-server --version 4.8.3
    /tmp/code-server/bin/code-server --auth none --port 13337 >/tmp/code-server.log 2>&1 &
  EOT
}

# Adds the "VS Code Web" icon to the dashboard
# and proxies code-server running on the workspace
resource "coder_app" "code-server" {
  agent_id     = coder_agent.primary.id
  display_name = "VS Code Web"
  slug         = "code-server"
  url          = "http://localhost:13337/"
  icon         = "/icon/code.svg"
  subdomain    = false
  share        = "owner"

  healthcheck {
    url       = "http://localhost:13337/healthz"
    interval  = 3
    threshold = 10
  }
}

# Creates a pod on the workspace namepace, allowing
# the developer to connect.
resource "kubernetes_pod" "primary" {

  # Pod is ephemeral. Re-created when a workspace starts/stops.
  count = data.coder_workspace.me.start_count

  metadata {
    name      = "primary"
    namespace = kubernetes_namespace.workspace.metadata[0].name
    labels    = local.labels
  }
  spec {
    service_account_name = kubernetes_service_account.workspace_service_account.metadata[0].name
    security_context {
      run_as_user = "1000"
      fs_group    = "1000"
    }
    container {

      # Basic image with helm, kubectl, etc
      # extend to add your own tools!
      image = "bencdr/devops-tools"

      image_pull_policy = "Always"
      name              = "dev"

      # Starts the Coder agent
      command = ["sh", "-c", coder_agent.primary.init_script]
      env {
        name  = "CODER_AGENT_TOKEN"
        value = coder_agent.primary.token
      }

      # Mounts /home/coder. Developers should keep
      # their files here!
      volume_mount {
        mount_path = "/home/coder"
        name       = "home"
        read_only  = false
      }
    }
    volume {
      name = "home"
      persistent_volume_claim {
        claim_name = kubernetes_persistent_volume_claim.home.metadata.0.name
        read_only  = false
      }
    }
  }
}

# Creates a persistent volume for developers
# to store their repos/files
resource "kubernetes_persistent_volume_claim" "home" {
  metadata {
    name      = "primary-disk"
    namespace = kubernetes_namespace.workspace.metadata[0].name
    labels    = local.labels
  }
  wait_until_bound = false
  spec {
    access_modes = ["ReadWriteOnce"]
    resources {
      requests = {
        storage = "10Gi"
      }
    }
  }
}

# Metadata for resources

resource "coder_metadata" "primary_metadata" {
  count       = data.coder_workspace.me.start_count
  resource_id = kubernetes_pod.primary[0].id
  icon        = "https://svgur.com/i/qrK.svg"
}

resource "coder_metadata" "pvc_metadata" {
  resource_id = kubernetes_persistent_volume_claim.home.id
  icon        = "https://svgur.com/i/qt5.svg"
  item {
    key   = "mounted dir"
    value = "/home/coder"
  }
}

resource "coder_metadata" "service_account_metadata" {
  resource_id = kubernetes_service_account.workspace_service_account.id
  icon        = "https://svgur.com/i/qrv.svg"
  hide        = true
}


resource "coder_metadata" "role_binding_metadata" {
  resource_id = kubernetes_role_binding.set_workspace_permissions.id
  icon        = "https://svgur.com/i/qs7.svg"
  hide        = true
}

Be sure to push a new template version:

coder templates push kubernetes-namespace-example

ℹ️ See my GitHub repository for a complete example of this template.

That's it!

From there, a developer can connect via VS Code, SSH, or a web terminal and deploy pods on the cluster!

Next steps

You may want to make some changes to the template to get it prepared for your project. Here are some ideas:

  • Use Tilt or Skaffold inside the workspace for faster Kubernetes development against the namespace.
  • Add Docker support to run the primary pod so users can build images from their workspace.
  • Add parameters to prompt developers with inputs on the "create workspace" page
  • Modify the template to include a custom base image with more tools (e.g. skaffold, Java, Python)
  • Add a Kubernetes Quotas to the namespace and template to prevent excessive resource use. Coder Quotas can prevent excessive workspace creation.

Feel free to reach out on Discord if you have questions.

Subscribe to our Newsletter

Want to stay up to date on all things Coder? Subscribe to our monthly newsletter and be the first to know when we release new things!