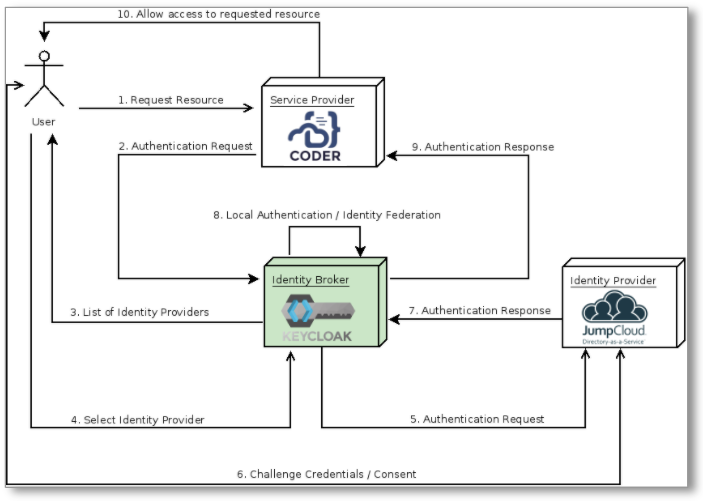
This article will show you how to set up and use Keycloak to broker JumpCloud SAML 2.0 logins to Coder.
We've based this configuration on the method described in the Keycloak Server Administration Guide's Identity Brokering section.
Step 1: Create a new Realm in Keycloak
The first part of configuring the identity broker is to add a new Realm. This
Realm will be where we will add the
JumpCloud <-> Keycloak <-> Coder SAML 2.0 to OIDC Bridge.
- Set up and install Keycloak.
- Create a new Realm.
Step 2: Configure JumpCloud
-
Log into your JumpCloud account.
-
Go to the SSO page and click the + to add a new SSO Service Provider.
-
Click Custom SAML App to add a custom Keycloak configuration.
-
Add a Display Label (e.g.,
Keycloak). -
Choose an IdP Entity ID value that is unique to your identity and Keycloak instance (e.g.,
jumpcloud-keycloak; this value must be the same for both). -
Specify the SP Entity ID and the ACS URL for the JumpCloud SAML IdP that you want to connect with. These values be formatted similar to the following:
SP Entity ID:
https://<my-keycloak-url>/auth/realms/<realm-name>ACS URL:
https://<my-keycloak-url>/auth/realms/<realm-name>/broker/<keycloak-idp-alias>/endpoint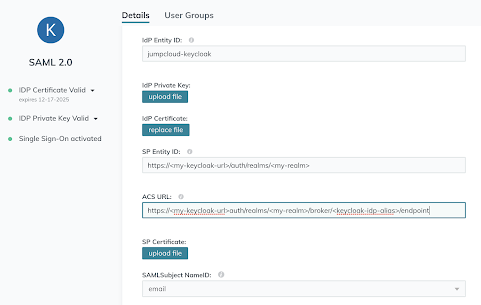
-
The remaining parameters can be left as is, so click Save to proceed.
-
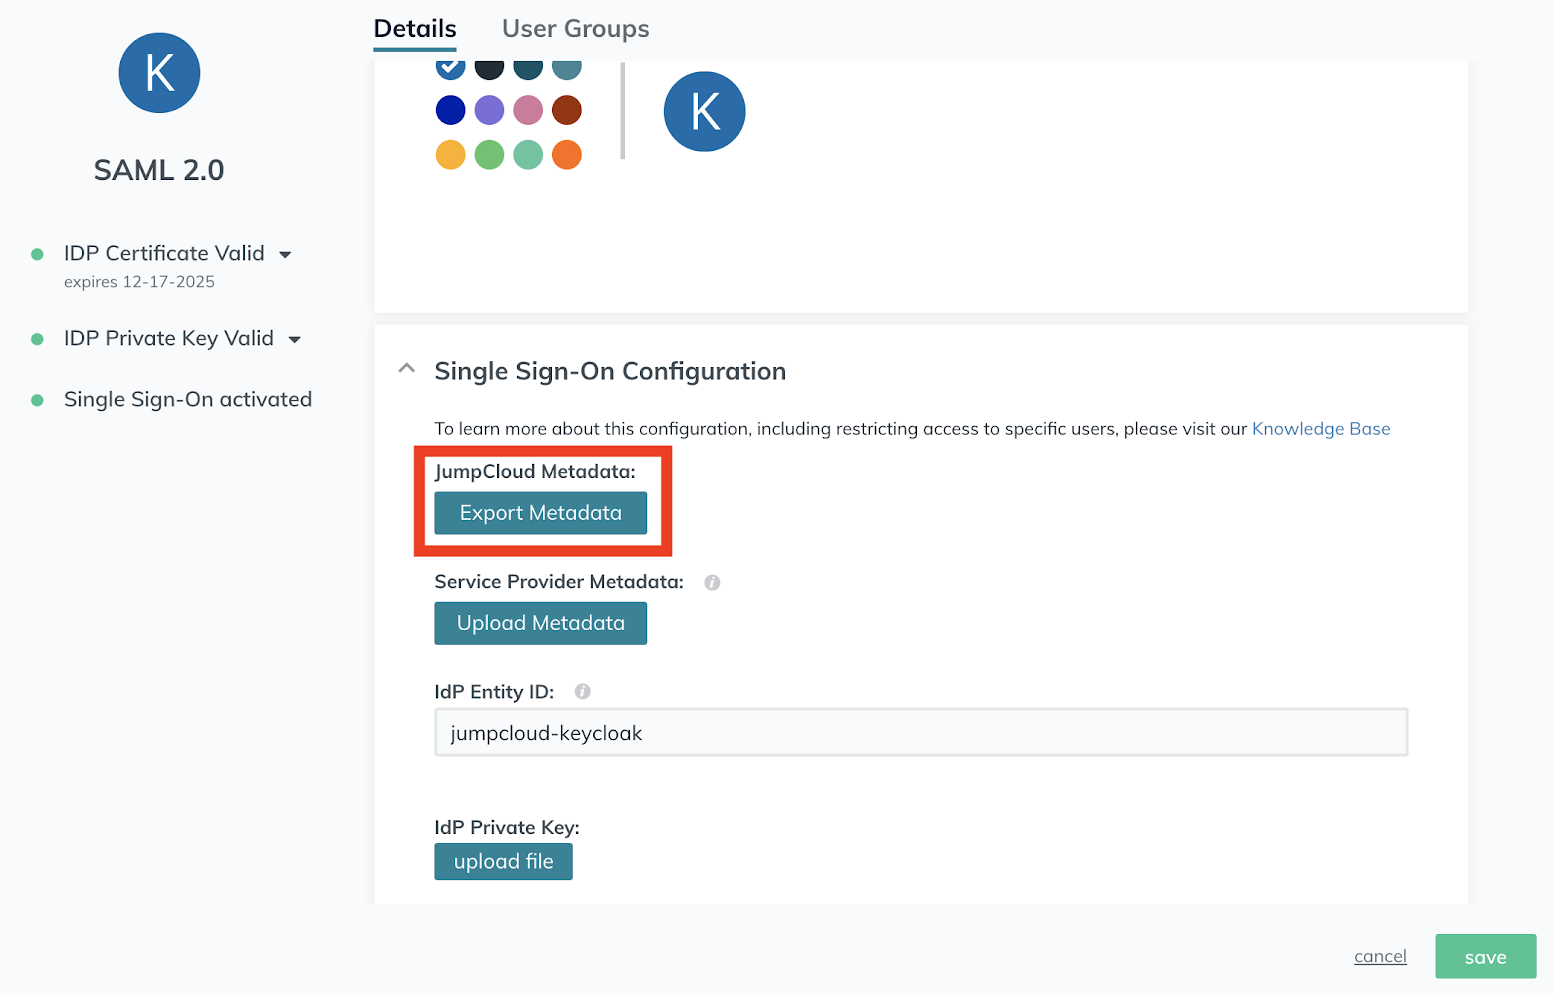
At this point, you should be able to open the Application Configuration backup on JumpCloud and export the IdP metadata to use with Keycloak.
-
On the User Groups tab, add the JumpCloud User Group(s) that need access to Coder.
Step 3: Configure Keycloak
-
Log in to Keycloak as an admin, and navigate to the Realm you created at the beginning of this tutorial.
-
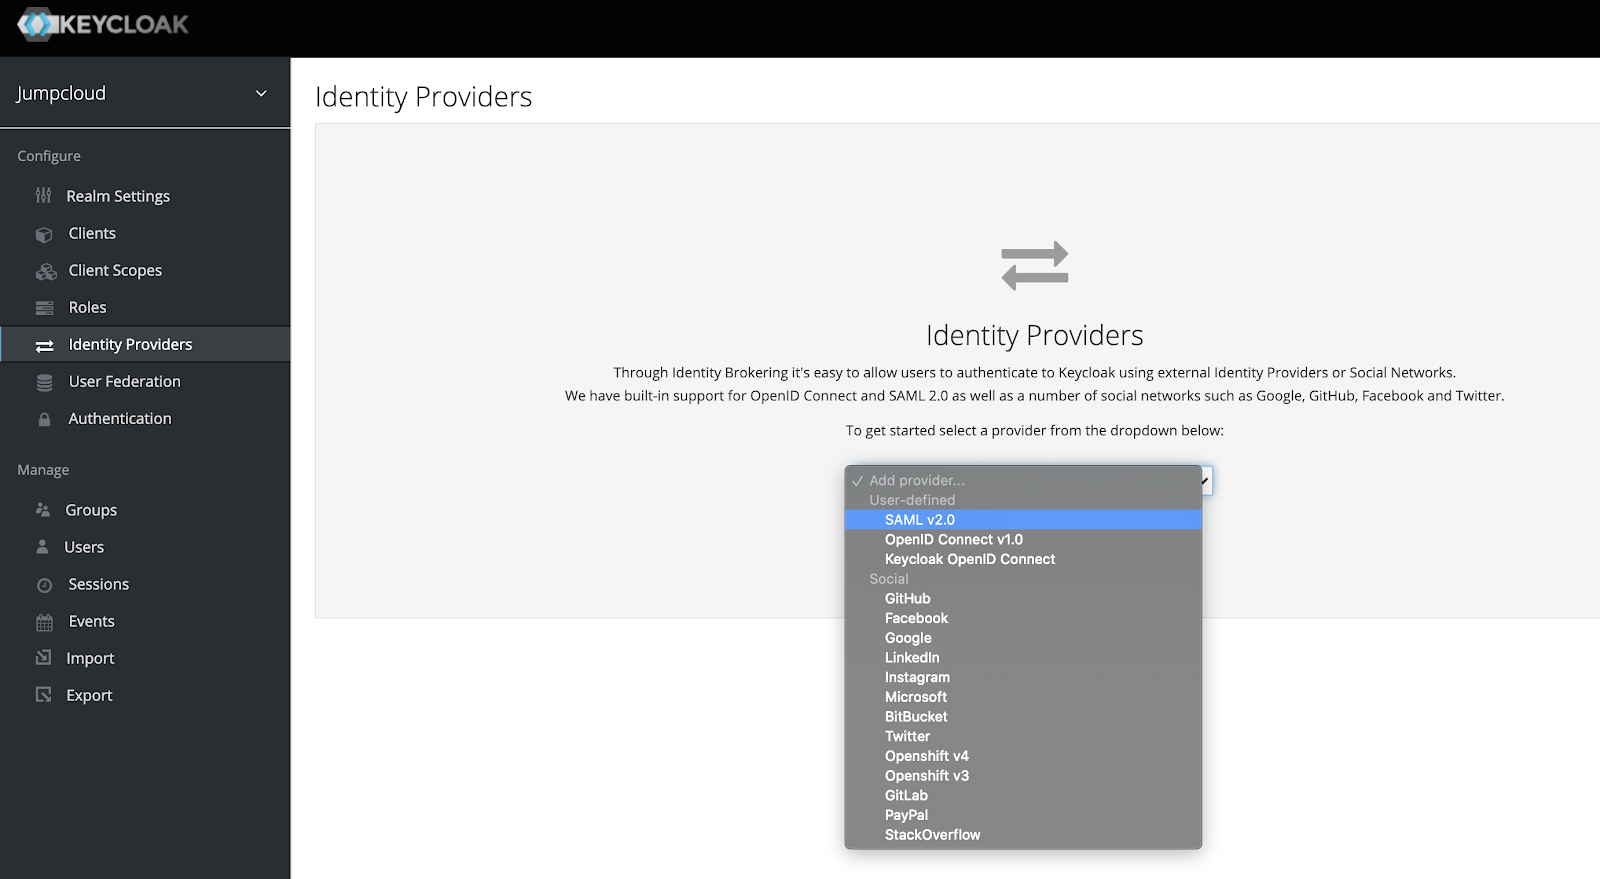
Go to the Identity Providers page for your Realm and click SAML 2.0 to set up your identity provider (this Keycloak document provides additional information about adding a SAML 2.0 Identity Provider).
-
On the IdP configuration page, specify an Alias to use for your IdP provider.
-
Scroll to the bottom of the configuration page and upload the IdP metadata you exported from JumpCloud.

Optional: Specify JumpCloud as the default IdP
-
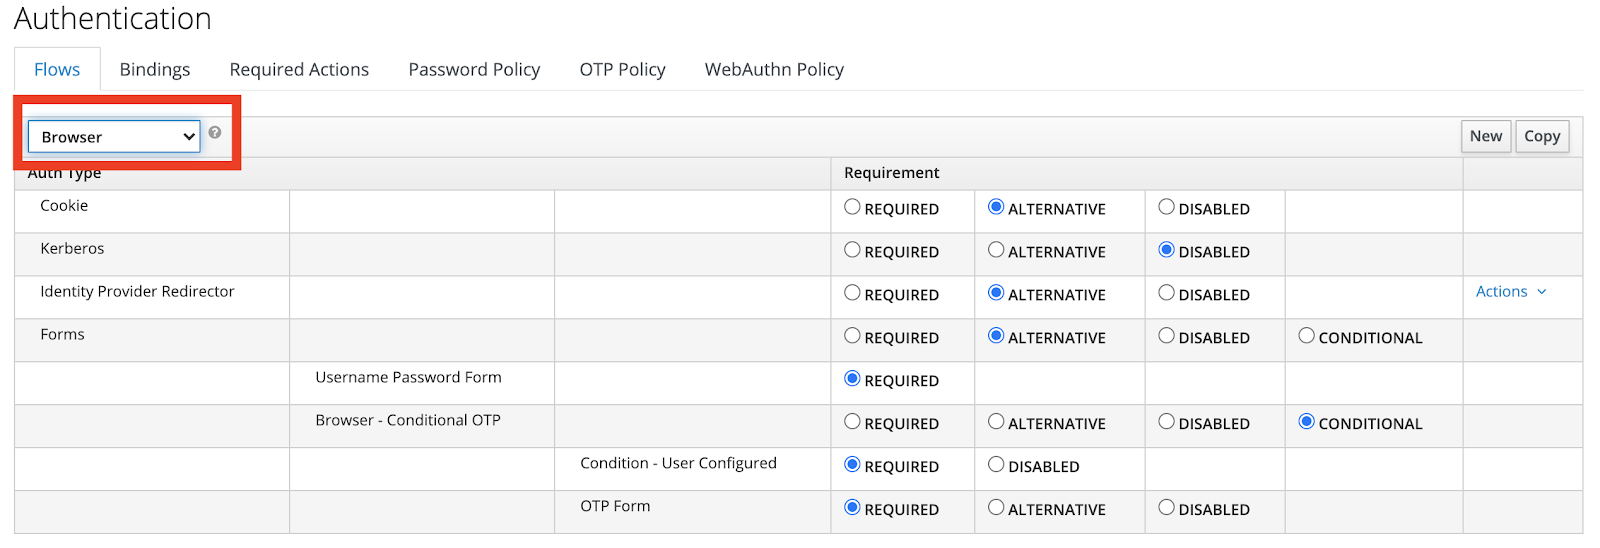
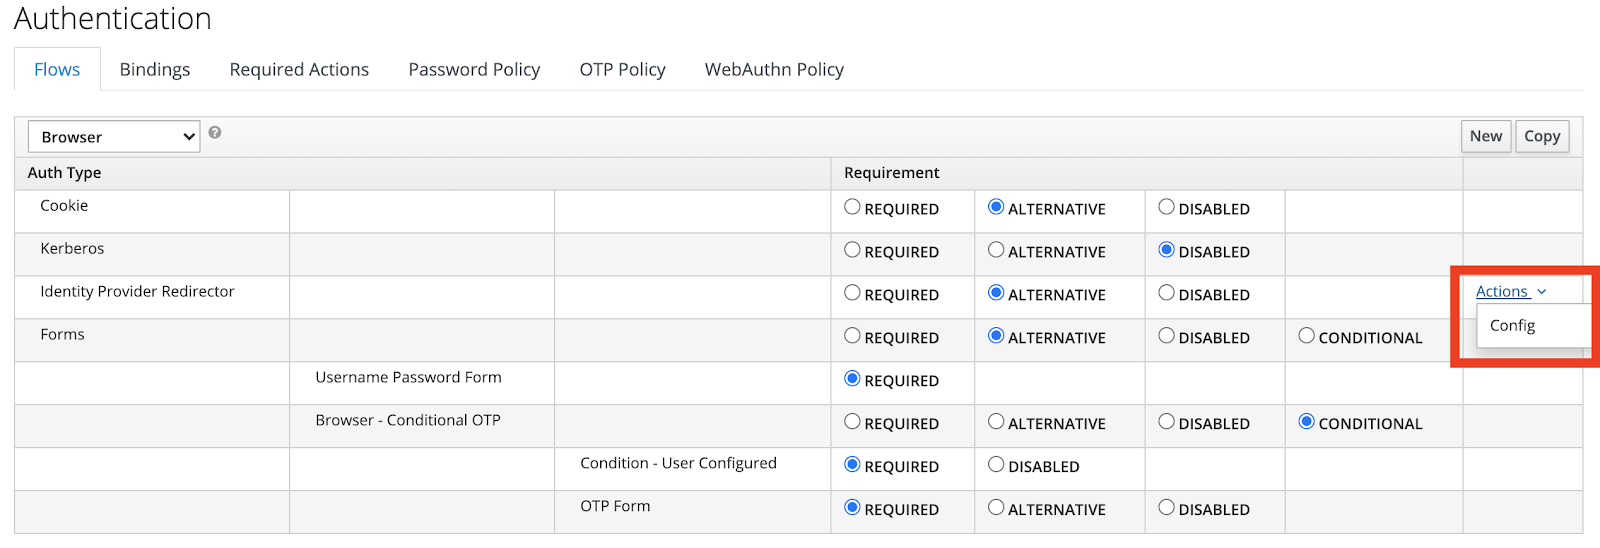
Navigate to Authentication.
-
Select the Browser flow from the dropdown in the top-left.
-
Find the Identity Provider Redirector row and click Actions > Config.
-
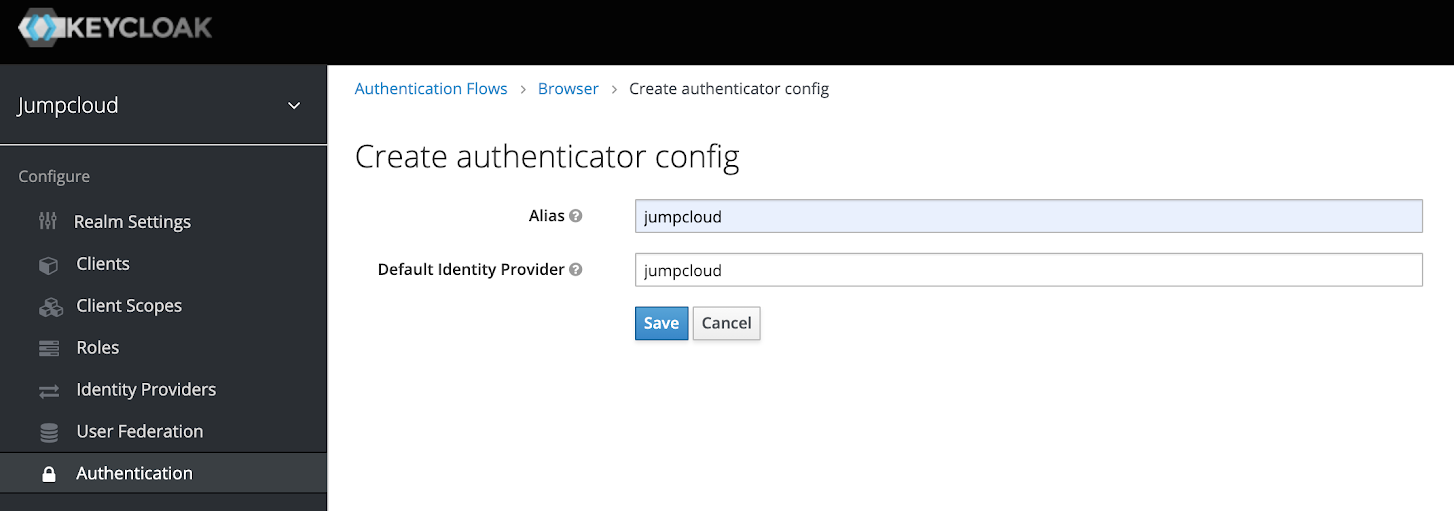
Set Alias and Default Identity Provider to the alias of the identity provider you created earlier.
Step 4: Configure the OpenID Connect (OIDC) Connector in Keycloak
-
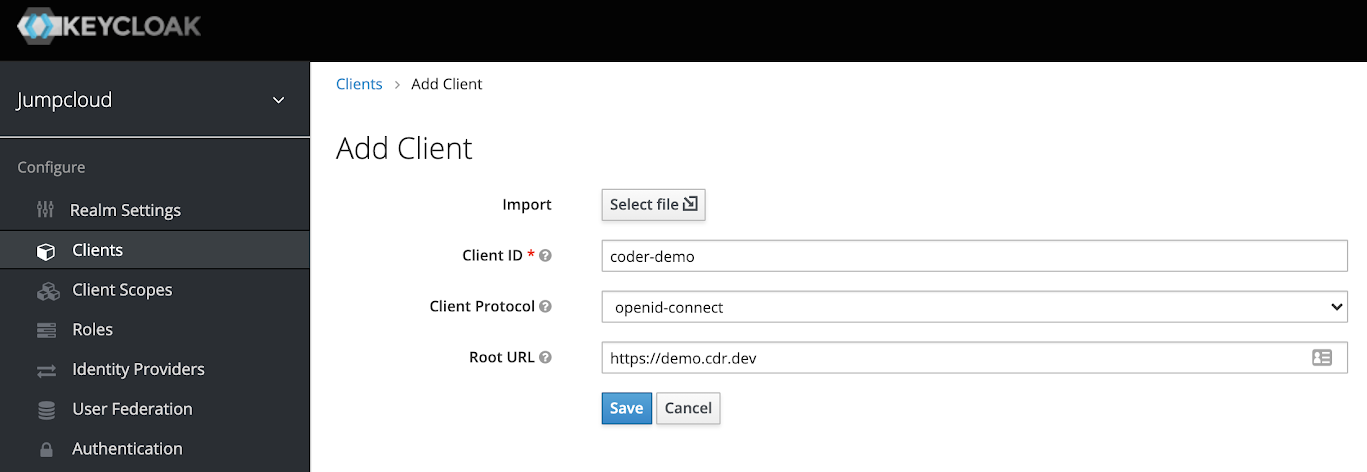
Navigate to Clients and click Create.

-
Add a new OIDC Client to point to your Coder deployment and click Save.
-
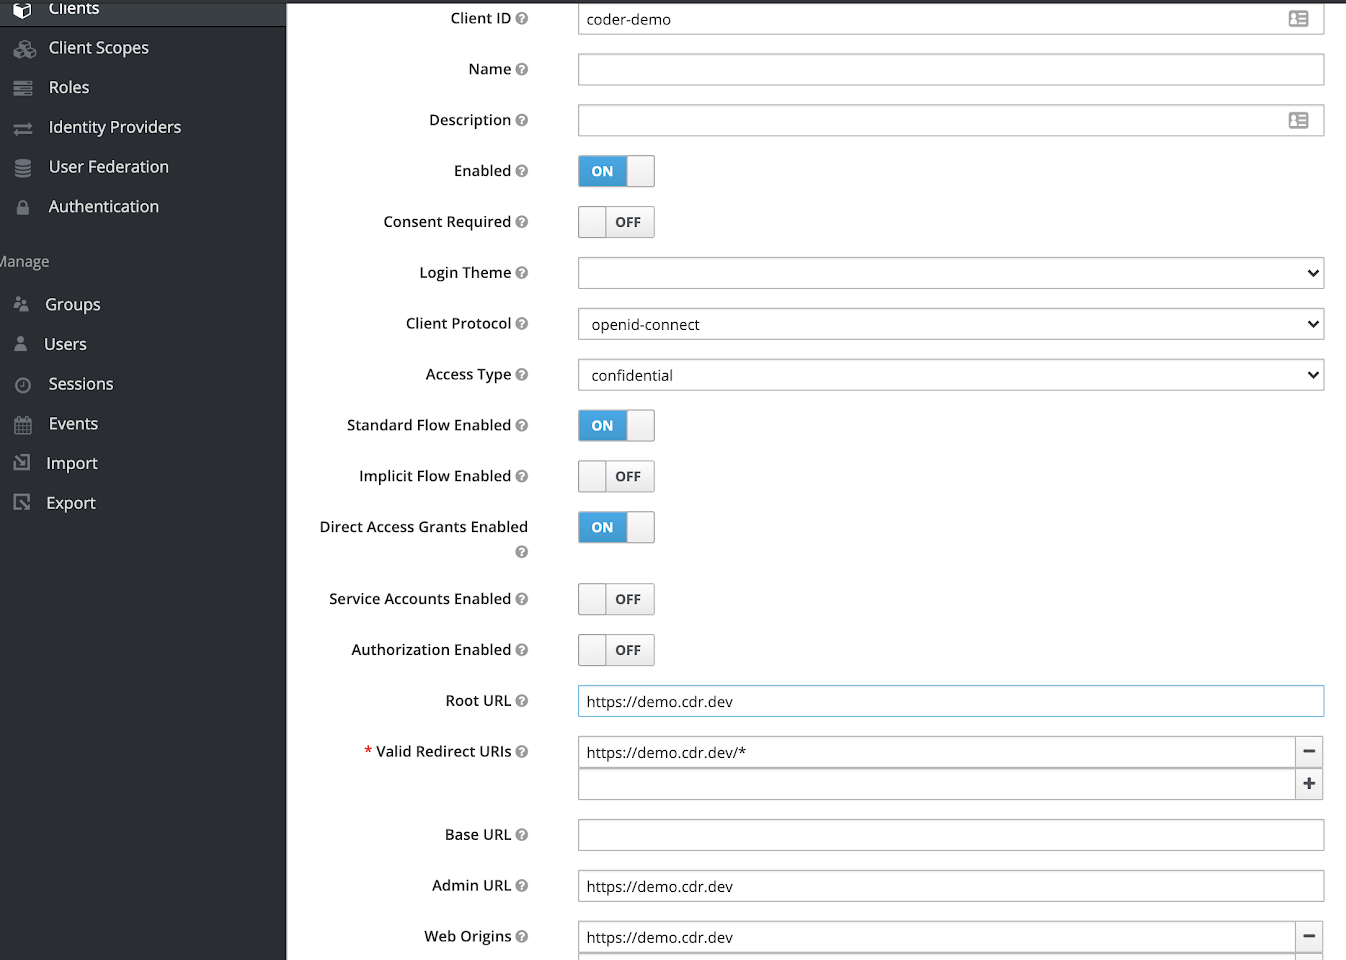
Once on the Clients configuration page, set the Access Type to Confidential and click Save.
-
Your client configuration should look something like the following (make sure that all of the values point to your Coder deployment):
At this point, you can configure your Coder deployment to use the Keycloak OIDC Connector.
Step 5: Configure Coder
-
Log in to Coder as an administrator and go to Manage > Admin.
-
Go to Authentication and select OpenID Connect from the dropdown.
-
Add the Client ID that you specified in Keycloak.
-
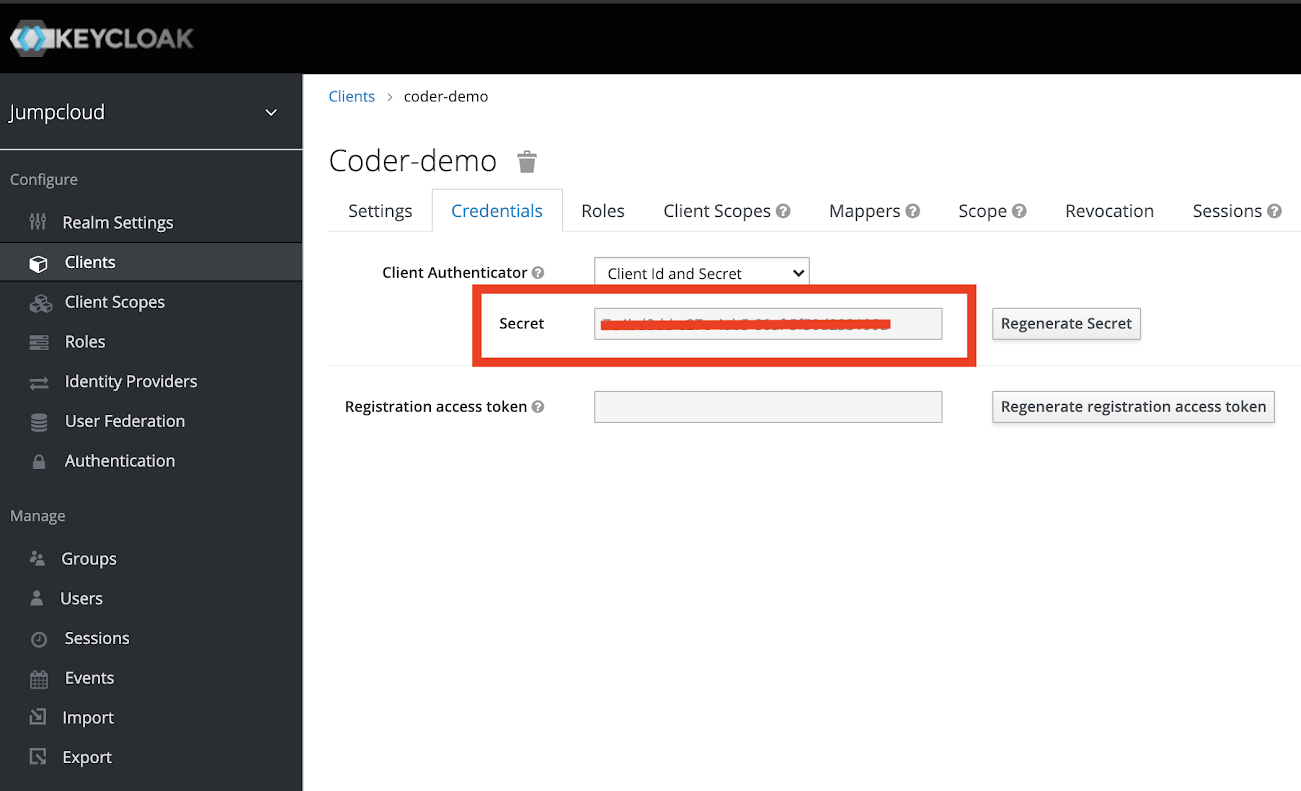
Add the Secret to the Client Secret field (you can get this value from the Credentials page in the Keycloak Clients Configuration).
-
Add your Keycloak instance and Realm as the
Issuer. This will be a URL formatted as follows:https://<my-keycloak-url>/auth/realms/<my-realm>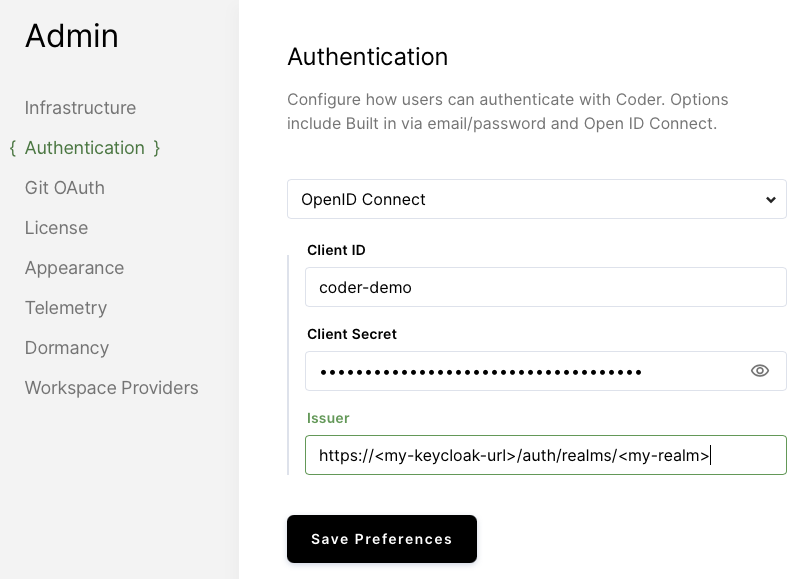
-
Click Save Preferences.
At this point, you should be able to log into Coder via OIDC.
You may have to adjust your
Auth Typeon theUserspage within your Coder deployment.
