
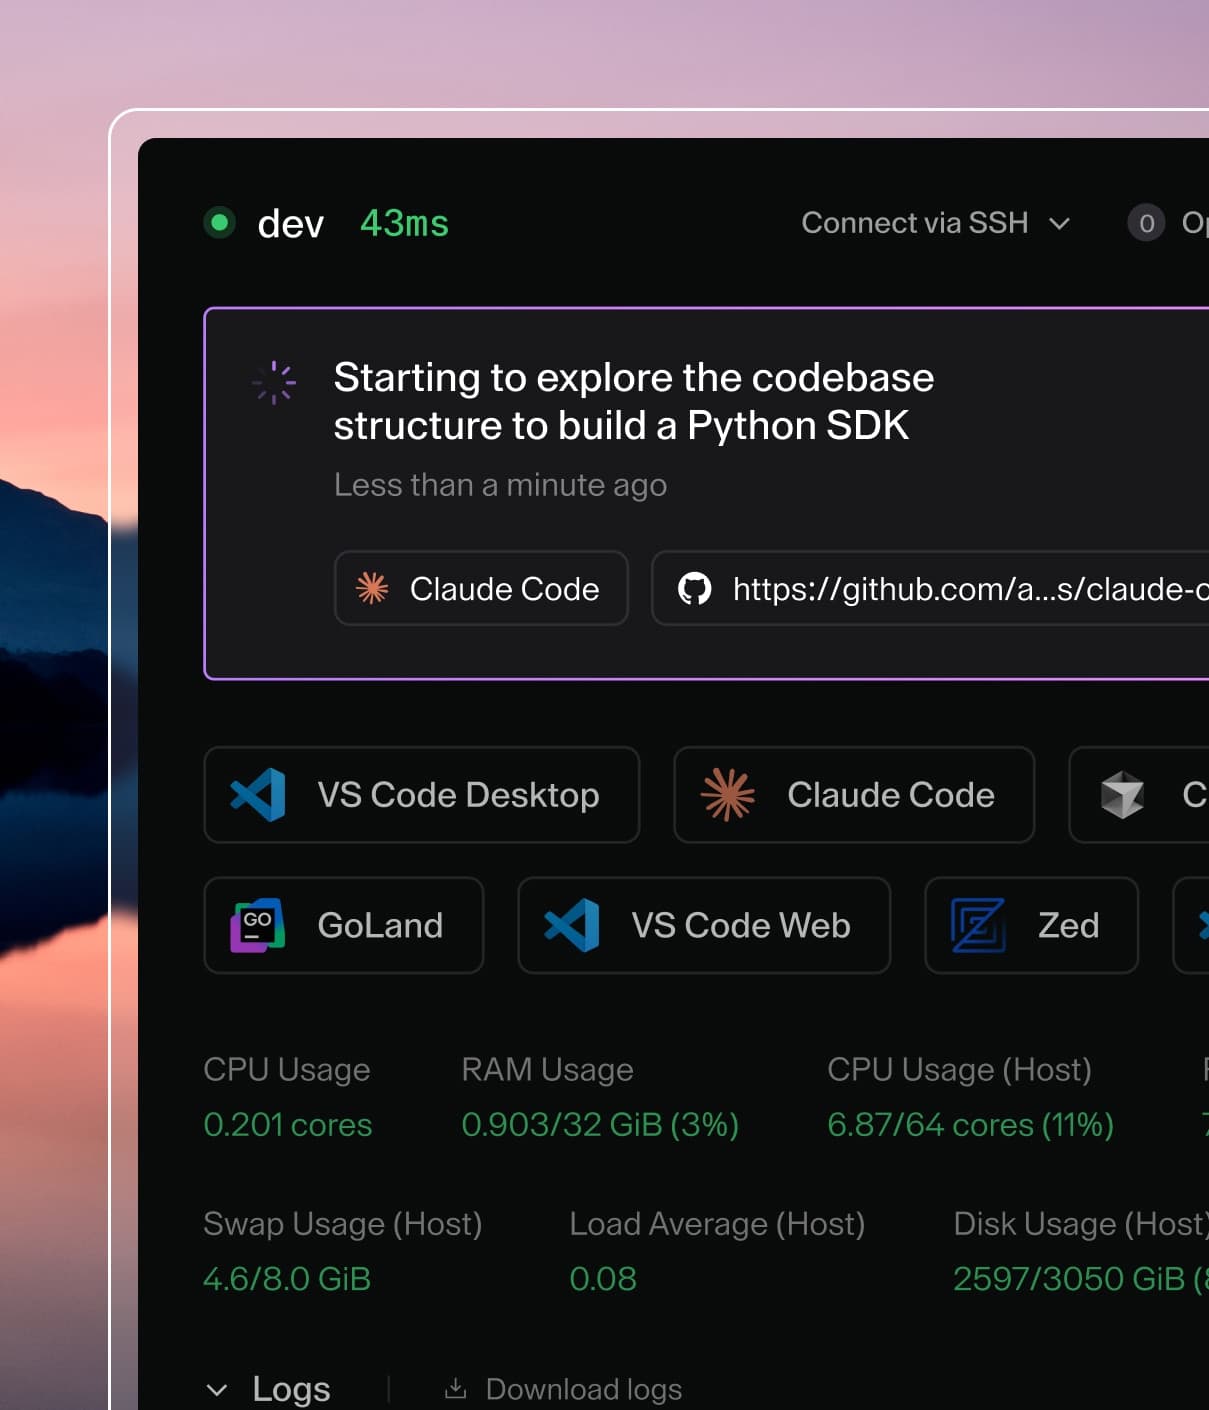

Coder Desktop
Coder Desktop provides seamless access to your remote workspaces through a native application. Connect to workspace services using simple hostnames like myworkspace.coder, launch applications with one click, and synchronize files between local and remote environments, all without installing a CLI or configuring manual port forwarding.
Tip
Coder Desktop provides automatic port forwarding to every service running in your workspace. Any port your application listens on is instantly accessible at workspace-name.coder:PORT with no manual setup required. For a comparison of all port forwarding methods, see Workspace Ports.
What You'll Need
- A Coder deployment running
v2.20.0or later - Administrator privileges on your local machine (for VPN extension installation)
- Access to your Coder deployment URL
Quick Start
- Install:
brew install --cask coder/coder/coder-desktop(macOS) orwinget install Coder.CoderDesktop(Windows) - Open Coder Desktop and approve any system prompts to complete the installation.
- Sign in with your deployment URL and session token
- Enable "Coder Connect" toggle
- Access workspaces at
workspace-name.coder
How It Works
Coder Connect, the primary component of Coder Desktop, creates a secure tunnel to your Coder deployment, allowing you to:
- Access workspaces directly: Connect via
workspace-name.coderhostnames - Automatic port forwarding: All workspace ports are available at
workspace-name.coder:PORTwith no configuration - Use any application: SSH clients, browsers, IDEs work seamlessly
- Sync files: Bidirectional sync between local and remote directories
- Work offline: Edit files locally, sync when reconnected
The VPN extension routes only Coder traffic—your other internet activity remains unchanged.
Installation
brew install --cask coder/coder/coder-desktop
Coder Desktop requires VPN extension permissions:
- When prompted with "Coder Desktop" would like to use a new network extension, select Open System Settings
- In Network Extensions settings, enable the Coder Desktop extension
- You may need to enter your password to authorize the extension
✅ Verify Installation: Coder Desktop should appear in your menu bar
Testing Your Connection
Once connected, test access to your workspaces:
ssh your-workspace.coder
Administrator Configuration
Organizations that manage Coder Desktop deployments can configure the application using MDM (Mobile Device Management) or group policy.
Disable Automatic Updates
Administrators can disable the built-in auto-updater to manage updates through their own software distribution system.
Set the disableUpdater preference to true using the defaults command:
defaults write com.coder.Coder-Desktop disableUpdater -bool true
Organization administrators can also enforce this setting across managed devices using MDM (Mobile Device Management) software by deploying a configuration profile that sets this preference.
Troubleshooting
Connection Issues
Can't connect to workspace
- Verify Coder Connect is enabled (toggle should be ON)
- Check that your deployment URL is correct
- Ensure your session token hasn't expired
- Try disconnecting and reconnecting Coder Connect
VPN extension not working
- Restart Coder Desktop
- Check system permissions for network extensions
- Ensure only one copy of Coder Desktop is installed
Collecting Logs
When reporting an issue, attach the relevant log files so we can diagnose it faster.
Coder Desktop and its network extension write to the Apple unified logging system. The file sync (Mutagen) daemon writes to a separate log file.
-
Export the unified logs for the last hour with the
logcommand:log show --predicate 'subsystem == "com.coder.Coder-Desktop"' \ --info --debug --last 1h > ~/Desktop/coder-desktop.logAdjust
--last(e.g.30m,2h,1d) to cover the time the issue occurred. You can also view the same logs interactively in Console.app by filtering on thecom.coder.Coder-Desktopsubsystem. -
If you're using file sync, also collect the Mutagen daemon log:
~/Library/Application\ Support/Coder\ Desktop/Mutagen/daemon.logCoder Desktop also opens this file in Console automatically when the file sync daemon fails.
Tip
Before attaching logs to a public issue, review them for any sensitive information (deployment URLs, usernames, hostnames) and redact as needed.
Getting Help
If you encounter issues not covered here:
Uninstalling
- Disable Coder Connect in the app menu
- Quit Coder Desktop completely
- Remove VPN extension from System Settings > Network Extensions
- Delete the app from Applications folder
- Remove configuration (optional):
rm -rf ~/Library/Application\ Support/Coder\ Desktop